https://ift.tt/3l3RkJo PyCaret 2.3.5 Is Here! Learn What’s New On the new functionalities added in PyCaret’s recent release (Image by A...
PyCaret 2.3.5 Is Here! Learn What’s New
On the new functionalities added in PyCaret’s recent release
🚀 Introduction
PyCaret is an open-source, low-code machine learning library in Python that automates machine learning workflows. It is an end-to-end machine learning and model management tool that speeds up the experiment cycle exponentially and makes you more productive. To learn more about PyCaret, you can check the official website or GitHub.
This article demonstrates the use of new functionalities added in the recent release of PyCaret 2.3.5.
🤖 New Models: DummyClassifier and DummyRegressor
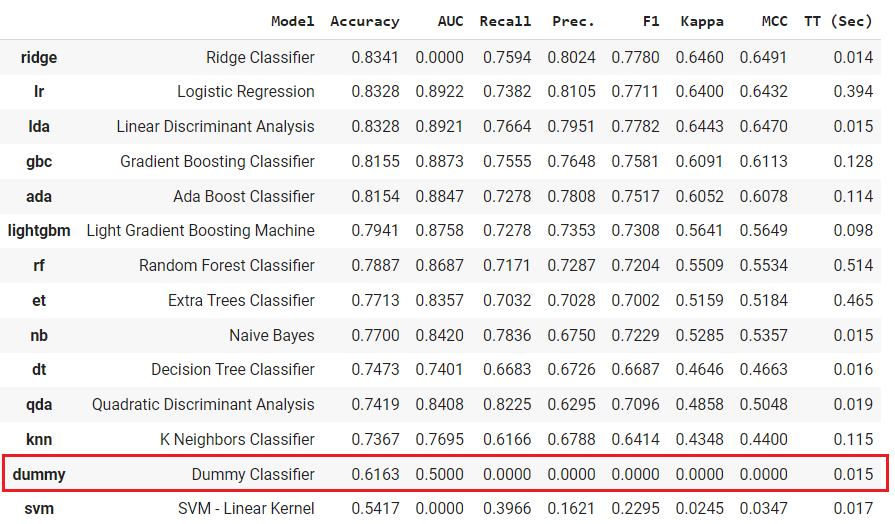
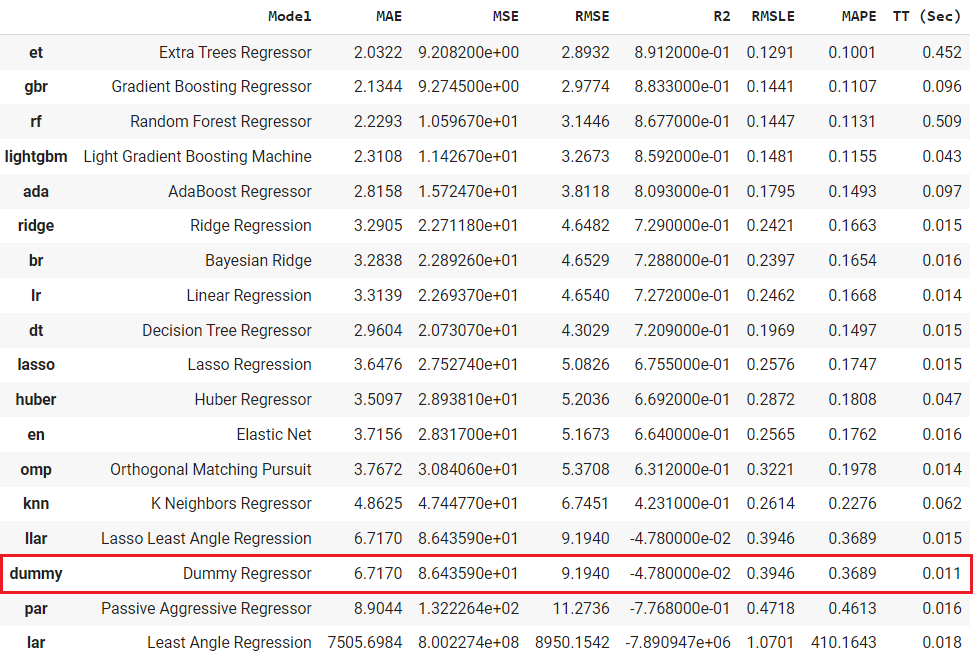
DummyClassifier and DummyRegressor are added in the model zoo of pycaret.classification and pycaret.regression modules. When you run compare_models it will train a dummy model (classifier or regressor)using simple rules and the results will be shown on the leaderboard for comparison purposes.
# load dataset
from pycaret.datasets import get_data
data = get_data('juice')
# init setup
from pycaret.classification import *
s = setup(data, target = 'Purchase', session_id = 123)
# model training & selection
best = compare_models()
# load dataset
from pycaret.datasets import get_data
data = get_data('boston')
# init setup
from pycaret.regression import *
s = setup(data, target = 'medv', session_id = 123)
# model training & selection
best = compare_models()
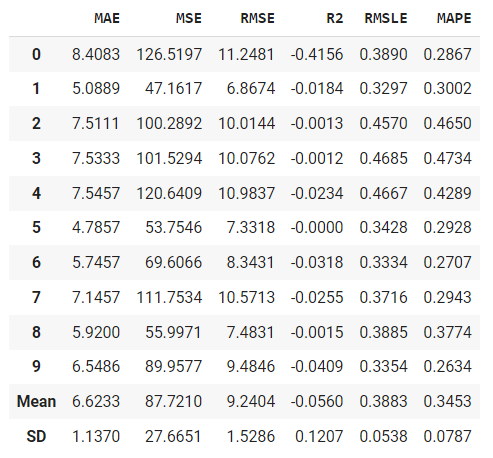
You can also use this model in the create_model function as well.
# train dummy regressor
dummy = create_model('dummy', strategy = 'quantile', quantile = 0.5)
Dummy models (classifier or regressor) are useful as a simple baseline to compare with other (real) regressors. Do not use it for real problems.
📈 Custom Probability Cut-off
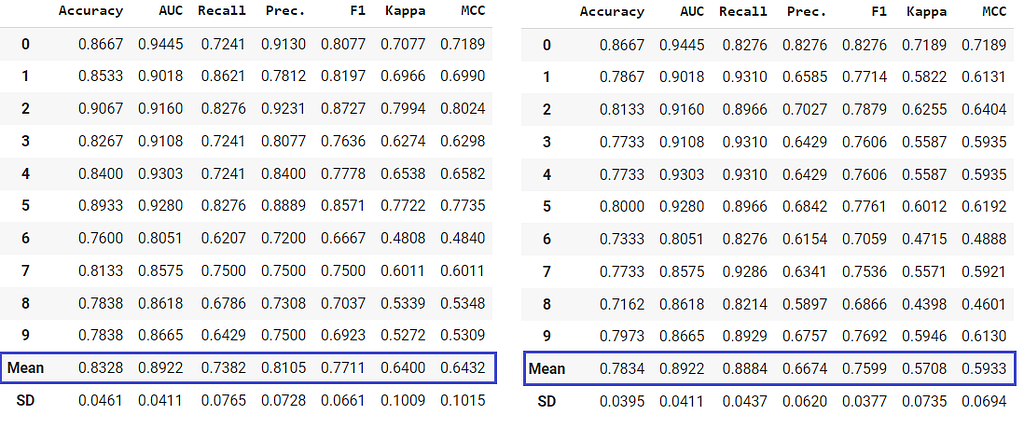
A new parameter probability_threshold is introduced in all the training functions of PyCaret such as create_model compare_models ensemble_model blend_models , etc. By default, all the classifiers that are capable of predicting probabilities use 0.5 as a cut-off threshold.
This new parameter will allow users to pass a float between 0 and 1 to set a custom probability threshold. When probability_threshold is used, the object returned by the underlying function is a wrapper of the model object, which means that when you pass it in the predict_model function, it will respect the threshold and will use them to generate hard labels on the passed data.
# load dataset
from pycaret.datasets import get_data
data = get_data('juice')
# init setup
from pycaret.classification import *
s = setup(data, target = 'Purchase', session_id = 123)
# model training
lr = create_model('lr')
lr_30 = create_model('lr', probability_threshold = 0.3)
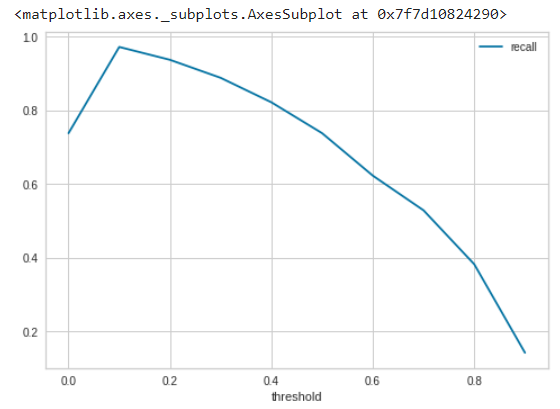
You can write a simple loop like this to optimize probability cut-offs:
# train 10 models at diff thresholds
recalls = []
for i in np.arange(0,1,0.1):
   model = create_model('lr', probability_threshold = i, verbose=False)
   recalls.append(pull()['Recall']['Mean'])
# plot it
import pandas as pd
df = pd.DataFrame()
df['threshold'], df['recall'] = np.arange(0,1,0.1), recalls
df.set_index('threshold').plot()
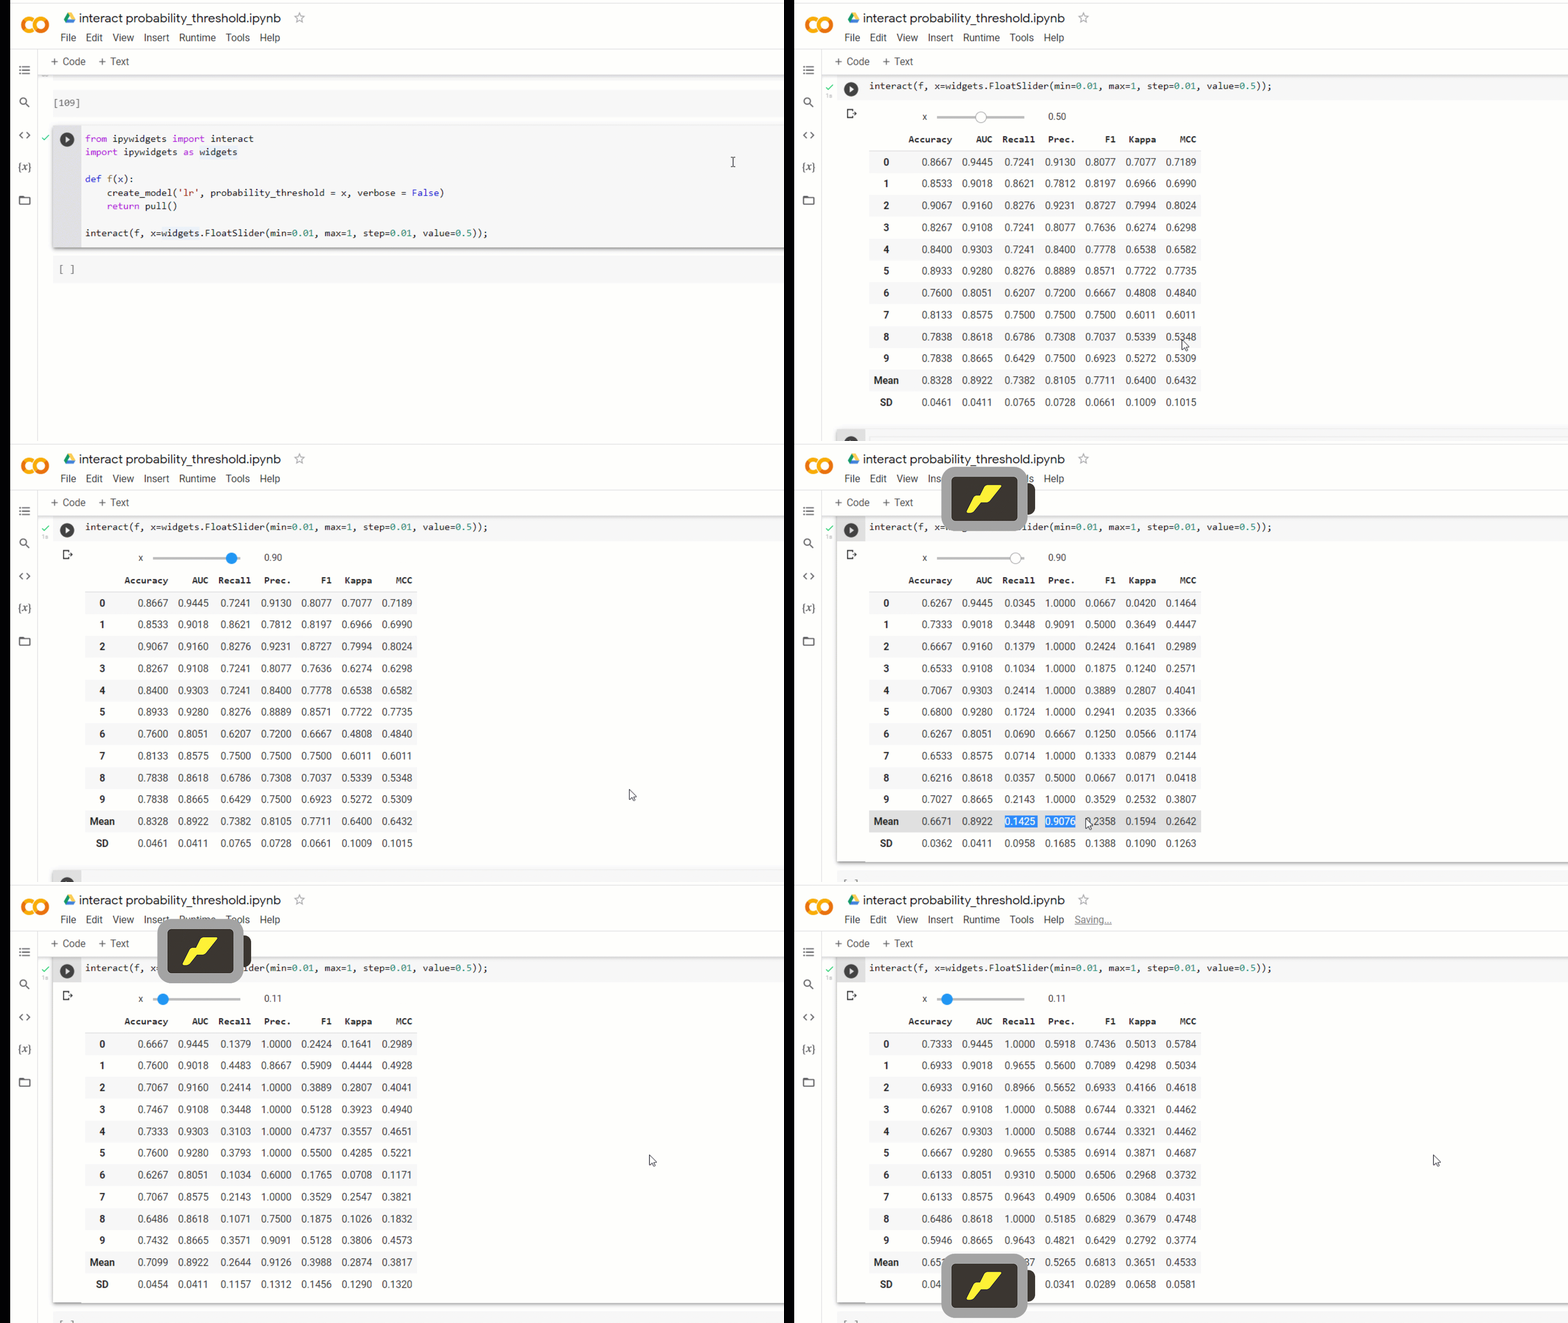
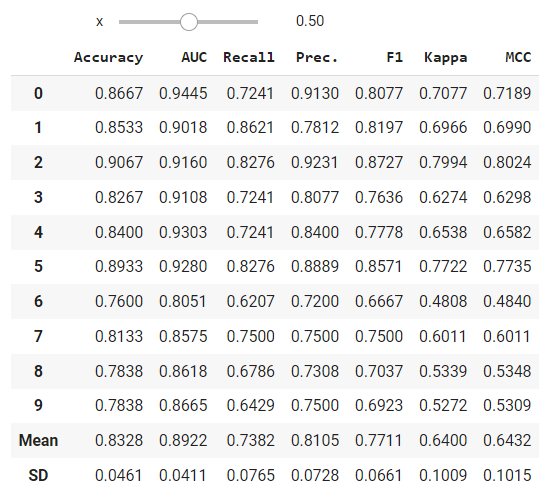
You can also simply build an ipywidgetsdashboard to test out different probability thresholds for different models.
from ipywidgets import interact
import ipywidgets as widgets
def f(x):
   create_model('lr', probability_threshold = x, verbose = False)
   return pull()
interact(f, x=widgets.FloatSlider(min = 0.01, max = 1.0, step = 0.01, value = 0.5));
Notebook with all the code examples shown in this announcement is in this Google Colab Notebook.
Important Links
⭐ Tutorials New to PyCaret? Check out our official notebooks!
📋 Example Notebooks created by the community.
📙 Blog Tutorials and articles by contributors.
📚 Documentation The detailed API docs of PyCaret
📺 Video Tutorials Our video tutorial from various events.
📢 Discussions Have questions? Engage with community and contributors.
🛠️ Changelog Changes and version history.
🌳 Roadmap PyCaret’s software and community development plan.
Author:
I write about PyCaret and its use-cases in the real world, If you would like to be notified automatically, you can follow me on Medium, LinkedIn, and Twitter.
📢Announcement: PyCaret 2.3.5 is here! Learn what’s new? was originally published in Towards Data Science on Medium, where people are continuing the conversation by highlighting and responding to this story.
from Towards Data Science - Medium https://ift.tt/3l2GVOe
via RiYo Analytics

No comments