https://ift.tt/UBpqLt1 Let’s walk through the process of taking a Jupyter Notebook you’ve been working on and sharing it with others using ...
Let’s walk through the process of taking a Jupyter Notebook you’ve been working on and sharing it with others using GitHub Gists. If the thought of new tools and platforms feels intimidating right now, don’t worry. Gists were built to simplify the process of showing off your work without requiring you to dive headfirst into complex Git commands. By the end of this tutorial, you’ll have a shareable link you can post anywhere, from a portfolio site to a discussion forum, to showcase your project or gather feedback.
Before You Begin
Before we start, make sure you have a GitHub account. Creating one is simple, just head over to github.com and follow the sign-up prompts. You’ll also want to have your completed project Jupyter notebook or other file type ready. For Python projects on Dataquest, this is the .ipynb file you produced while completing a guided project. If you haven’t downloaded it yet or aren’t sure how, we’ll cover that in a moment.
Why Gists Matter
Sharing code files can be tricky if you’ve never done it before. For example, if you open a Jupyter notebook file directly on your computer without having Jupyter installed, you’ll see a bunch of raw text and JSON-like formatting instead of nice, clean renderings of your code and visualizations. This is where Gists can come in. They automatically render .ipynb files online so anyone with the link can view your code cells, plots, and analyses just like you see them online or in your local coding environment. What’s more, Gists let you track different versions of your work, so you can update your project if you receive feedback or discover a typo.
Step One: Prepare your File
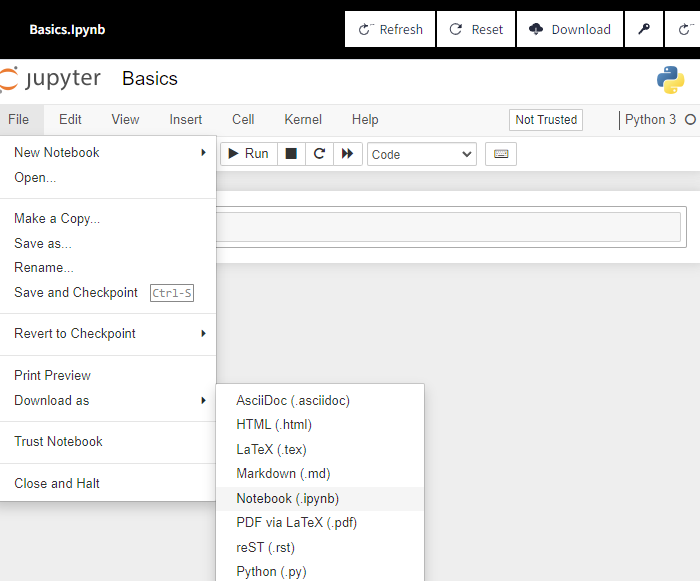
If your project lives on Dataquest’s platform or another online space, you’ll need to download it. You can do this by locating your notebook in the interface and then selecting the file. Look for an option to download, often found either in a menu or by right-clicking on the file’s name. After downloading, rename the file to something descriptive, like nyc_school_data_demo.ipynb. This helps you remember which project it is, especially if you plan on sharing multiple projects. Below are examples of downloading may look like for both common versions of Jupyter: Jupyter Notebook and Jupyter Lab.
Jupyter Notebook Download
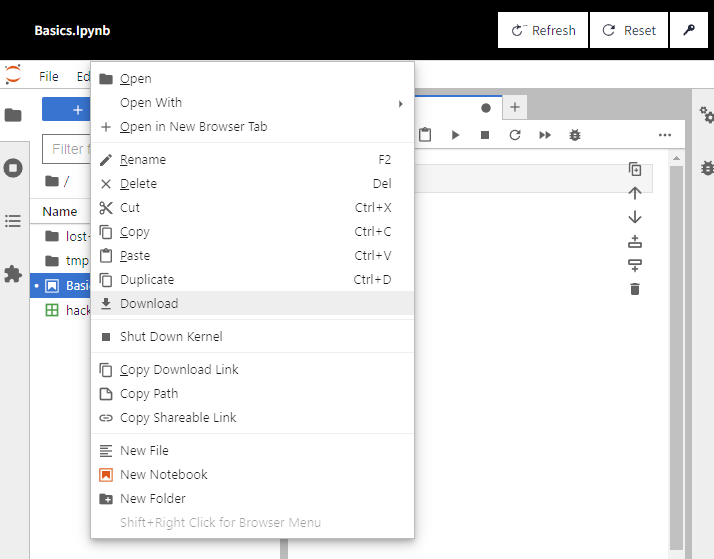
Jupyter Lab Download
Step Two: Create a New Gist on GitHub
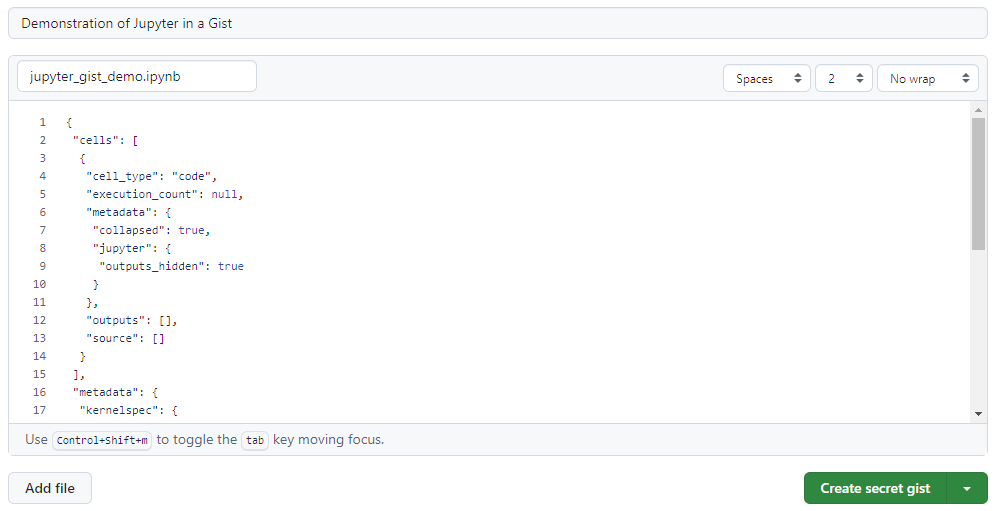
Next, head to gist.github.com and sign in. Once you’re there, you’ll see a blank space prompting you to create a new Gist. You can either drag and drop your file onto the page or copy/paste your code. At this point, you might see the file’s raw text, but that’s completely normal. GitHub will properly render everything once you complete a few final steps.
Step Three: Name, Describe, and Choose Visibility
Right above the main content area, you can add a short description of your notebook. For instance, you might write “Guided Project: Analysis of NYC School Data (Dataquest)” if you just completed the NYC School project on the platform. If using Jupyter, make sure the filename ends with .ipynb so GitHub knows to treat it like a Jupyter Notebook.
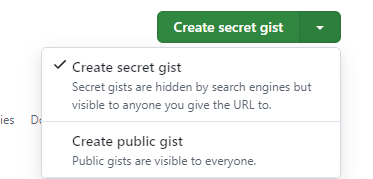
You’ll also notice a button with dropdown options for your Gist’s visibility: Public or Secret. Public Gists can be found by anyone, even via search engines, and are best if you want to share your work widely. Secret Gists won’t show up in general searches but can still be accessed if someone has the direct link. If you’re nervous about making your work too visible too soon, feel free to keep it secret until you’re ready.
Step Four: Confirm the Notebook Rendering
Once you’ve created the Gist, you should see your notebook looking much like it did while working on the project code, including any charts or tables you had in your final output cells. If something doesn’t look right—perhaps the file shows raw JSON—double-check that you included the .ipynb extension when you named the file.

Step Five: Share Your Link and Gather Feedback
Your Gist now has its own URL, which you can copy from the address bar at the top of your browser. You can post it on social media, embed it in a personal website, or add it to your portfolio page. If you’d like to collect feedback, share the link with peers or mentors and invite them to leave comments directly on the Gist.
Some communities, including Dataquest’s own forums, allow you to post a link to your project in dedicated spaces for feedback. It’s helpful to let people know you’re using a Gist if they’re not familiar with it so they understand that clicking the link will bring them to a rendered notebook.
You might also want to include attribution or citation credits for any data, images, or code you borrowed. An easy way to do this is by leaving a Gist comment that briefly states the source and how the material was used. For example, if you used a dataset from Kaggle, you could comment, “Data courtesy of [Dataset Name] from Kaggle, retrieved from [link].” This way, anyone viewing your Gist can quickly see where your materials came from and give proper credit.

Keeping Your Gist Updated
Let’s say someone suggests a change to your code, or you notice a small error in your analysis. You have two options for updates:
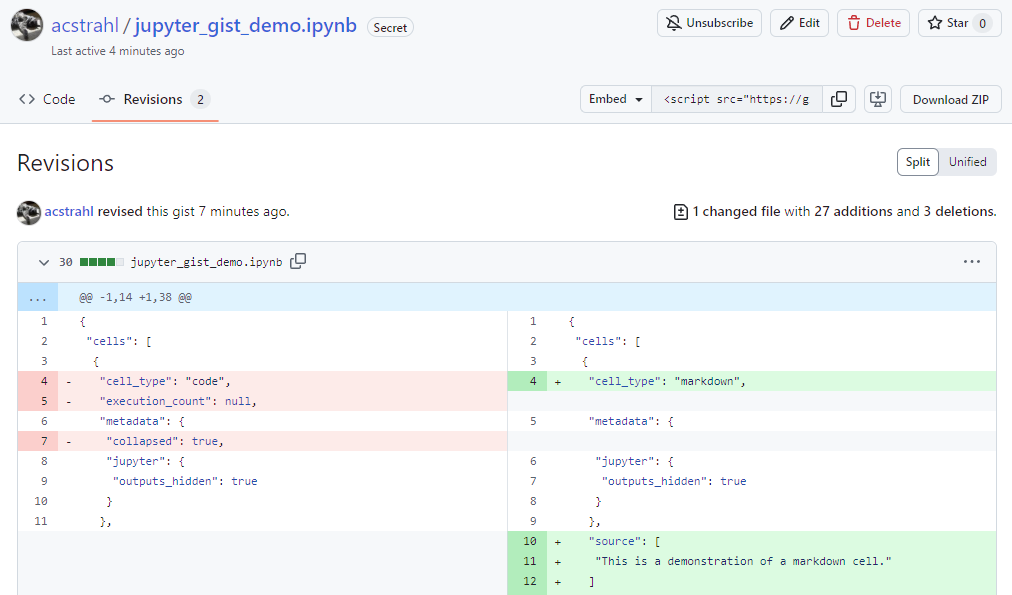
- Minor Edits: If it’s just a typo or a small wording change, click the “Edit” button on your Gist, scroll through the raw code, and make the edit right there. When you save, GitHub will keep track of the revisions in a “Revisions” tab, where you can see a “diff” showing exactly what changed.
-
Major Changes or New Code: Maybe you need to adjust the color of a plot or correct a calculation. In that case, open your original notebook in Dataquest (or in another Jupyter environment), make the changes, re-run all the cells, and download a fresh copy. Then go back to your Gist, choose “Edit,” remove the old code, and drag-and-drop the new file. Your Gist’s revision history will keep track of all these changes, so you never lose earlier versions.
Troubleshooting Common Issues
If your notebook doesn’t render right away, check that the file has the .ipynb extension. Occasionally, the page may need a quick refresh. If your plots aren’t displaying, it might be that you downloaded your file before running all the cells—running them again and re-downloading should fix that. Also, remember that a Gist is meant primarily for sharing (and optionally commenting on) static notebooks. If you’re looking for a place where people can run your code directly, you’ll want to explore more advanced GitHub features or full repositories.
Next Steps and Final Thoughts
By putting your project on a Gist, you’re already one step into the world of version control, which tracks changes over time and allows others to contribute feedback. You don’t need to learn complex Git commands for this—just edit your Gist and let GitHub handle the rest.
From here, consider adding your Gist links to any personal portfolio sites, resumes, or social media pages. If you’re looking for structured feedback from other learners or mentors, hop onto the Dataquest forums (or any community you belong to) and drop your Gist link. The more you share your work, the easier it becomes to refine your skills and showcase them confidently.
Congratulations, you’ve just made your project easily accessible to anyone with an internet connection. Gists are a simple yet powerful tool for sharing your data analysis work, and they give you a taste of what it’s like to manage, update, and iterate on projects without getting overwhelmed by the details of traditional Git workflows. Feel free to explore and create additional Gists for future projects, or even combine multiple files into one Gist to keep related work in a single place. Good luck, and happy coding!
from Dataquest https://ift.tt/RFemrC8
via RiYo Analytics


No comments