https://ift.tt/G8NxOSH My recipe to reach those last percents of (ac)cu(re)teness Image by author (generated with ) Background I faced...
My recipe to reach those last percents of (ac)cu(re)teness
Background
I faced a challenge of handwritten amounts that needed to be recognized as precise as possible. The difficulty lies in keeping the false positives below 0.01% . The amount of samples in the dataset was fixed, so data augmentation is the logical go-to. A quick search revealed no of-the-shelf method for Optical Character Recognition (OCR). So I pulled up my sleeves and created a data augmentation routine myself. It was used during training and helped my model reach the objective. Read on to know how.
By introducing small changes each time an image is trained, the model is less likely to overfit and generalize better. I used it in conjunction with TROCR, but any other model should benefit as well.
Test setup
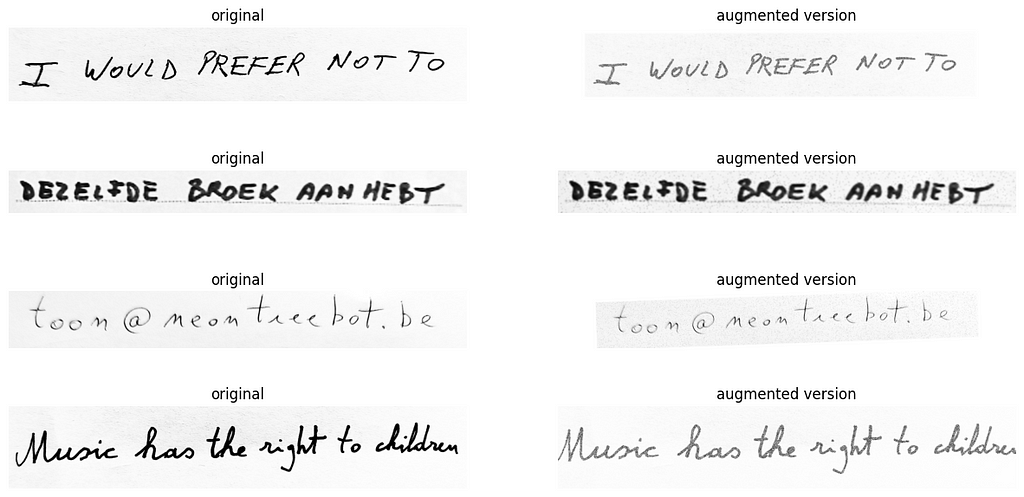
Since I can’t share images from my proprietary dataset, I wanted to use samples from the IAM Handwriting Database, but I didn’t get a reply to my request for permission to use it in this article. So I created some of my own examples for demonstrating.
I will make use of OpenCV and the albumentations library, for three kinds of alterations: morphological, noise and transformations.
OpenCV is a well known computer vision library. Albumentations is a relatively new Python library for easy yet powerful image augmentations.
There is also a nice demo website where you can try what albumentations can do. It is however limited because you can’t use your own image to test on. So, I created a Jupyter notebook that I used to render all augmented images in this article. Feel free to open it in colab and experiment.
I will first show the alterations by itself with some explanation and then i will discuss my technique to combine all of them. I will suppose that all images are grayscale and will have undergone already contrast enhancement (eg. CLAHE).
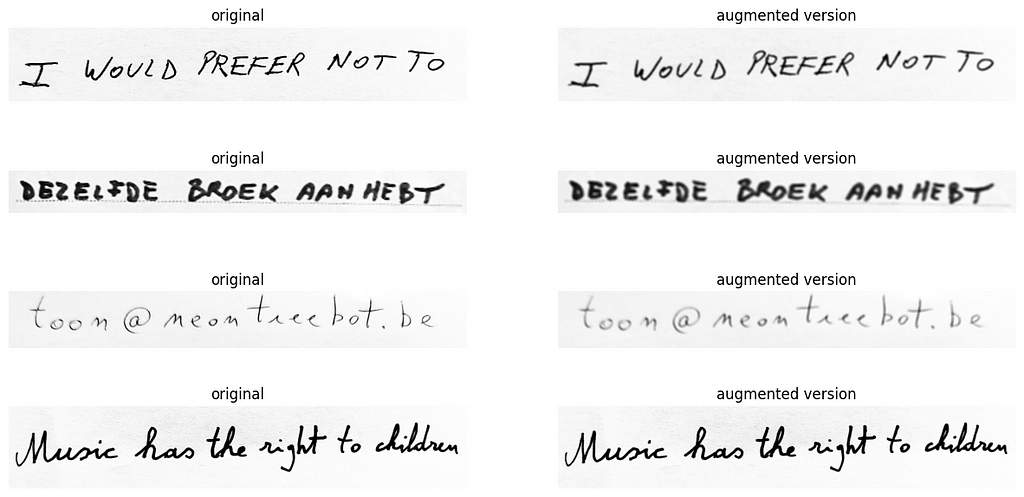
1st augmentation technique: morphological alterations
These relate to the form of structure. To put it in simpler terms: they can be used to make the text lines appear to be written with a finer or thicker pen. Erosion and dilation they are called. Unfortunately these are not (yet?) part of the albumentations library, so i have to resort to opencv for this.
To create the effect that somebody used a pen with a fatter line width, we can dilate the original:
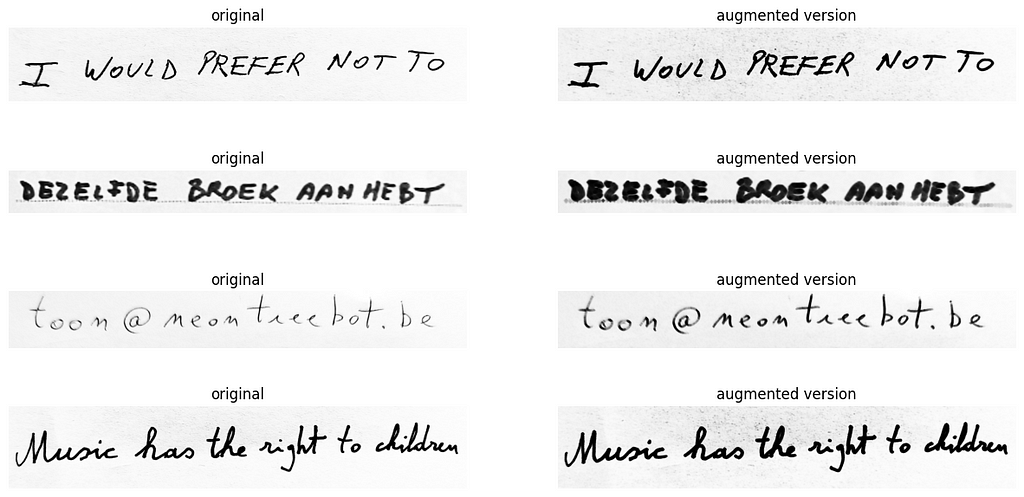
Erosion on the other hand (pun intended) simulates that the text has been written with a finer pen:
Be careful here that the last parameter — which is the number of iterations — is not set too high (here it was set to 3), otherwise you end up with the handwriting completely removed.
cv2.dilate(img, kernel,iterations=random.randint(1, 3))
For my dataset I could only set it to 1, so this really depends on your data.
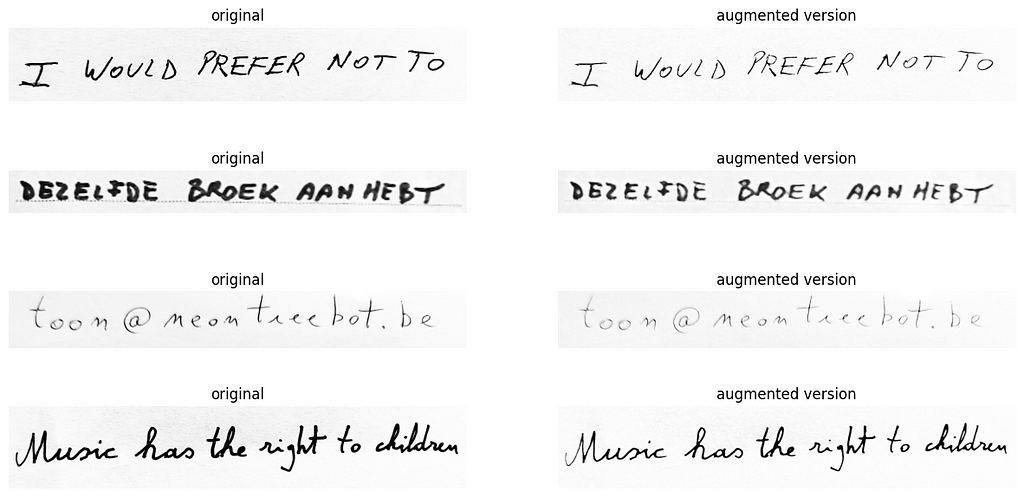
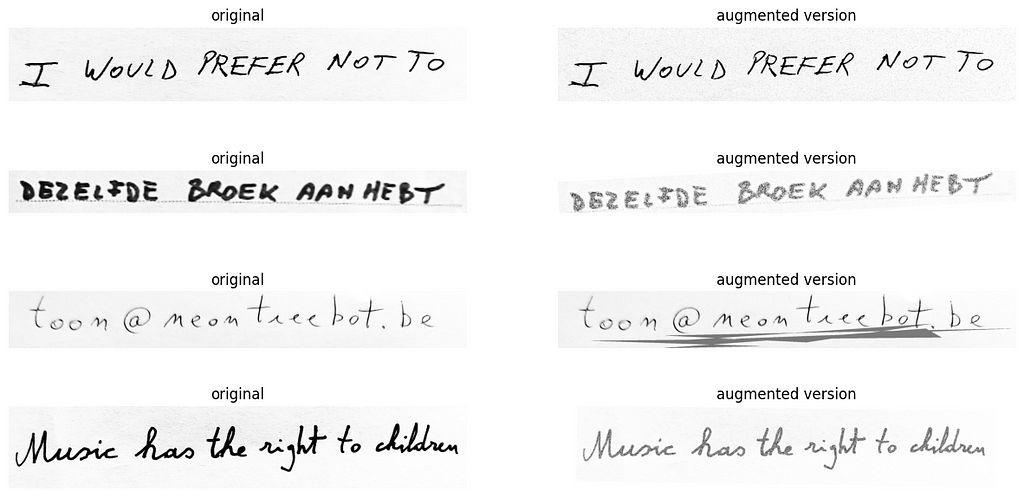
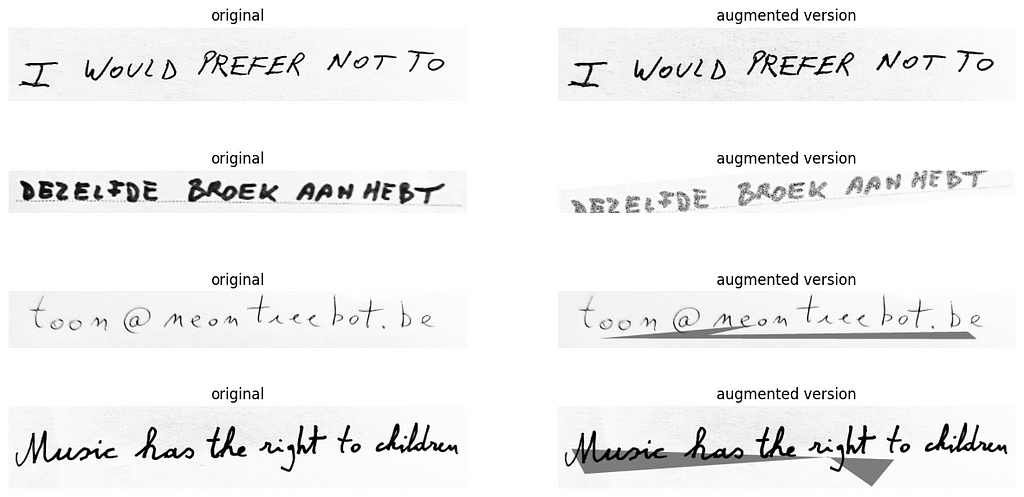
2nd augmentation technique: noise introduction
We can either remove black pixels or add white pixels to the image. there are several methods to that. I have experimented with many of them, but here is my shortlist:
RandomRain with black drop color is very damaging. Even for me it’s hard to still read the text. That’s why i opt to set the chance of this happening very low:
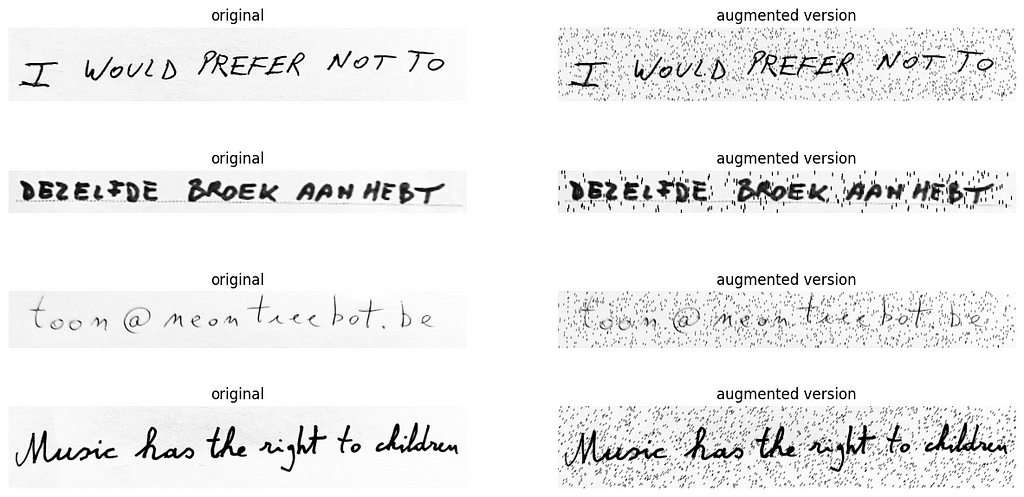
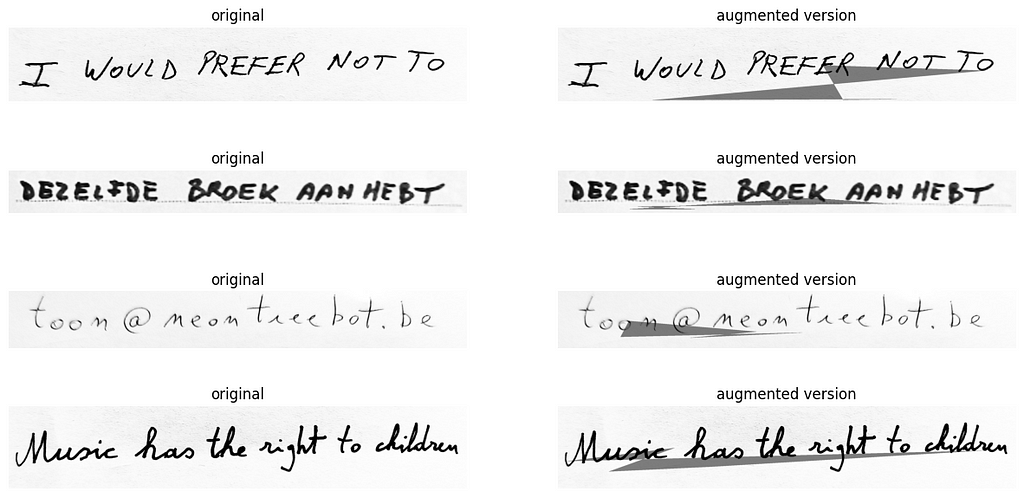
RandomShadow will smudge the text with lines of varying intensity:
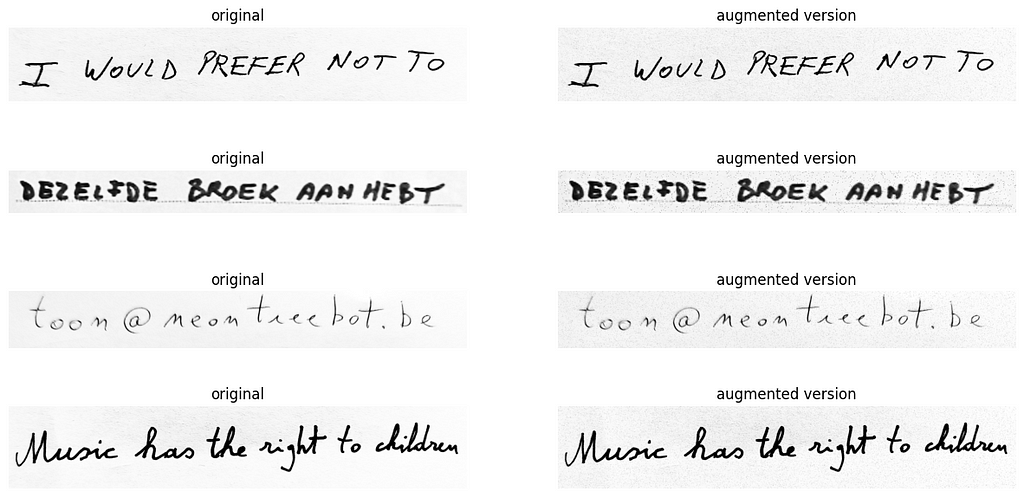
PixelDropout gently turns random pixels into black:
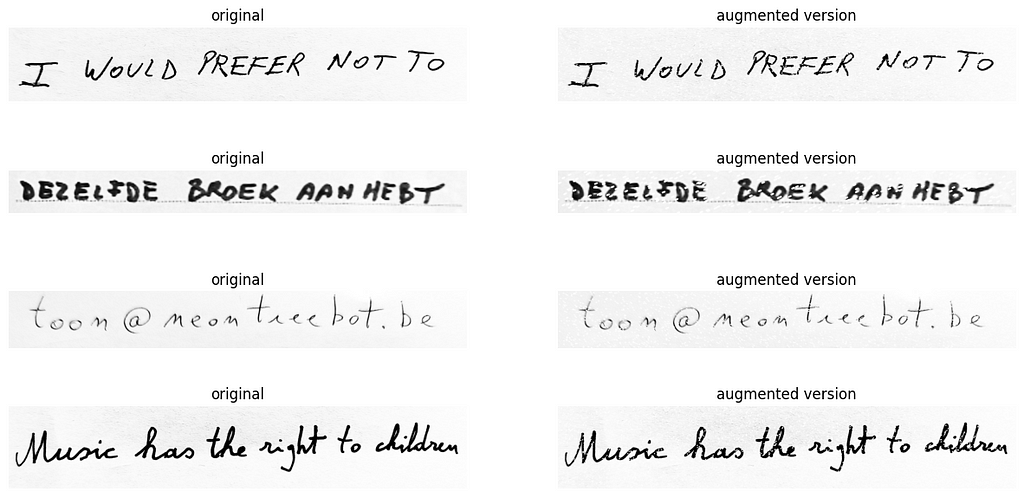
Unlike with black color drops, RandomRain with white drop color disintegrates the writing, which hardens the training. Much like the bad quality you see when a photocopy of a xerox of a fax was taken. The probability of this transform happening can be set much higher.
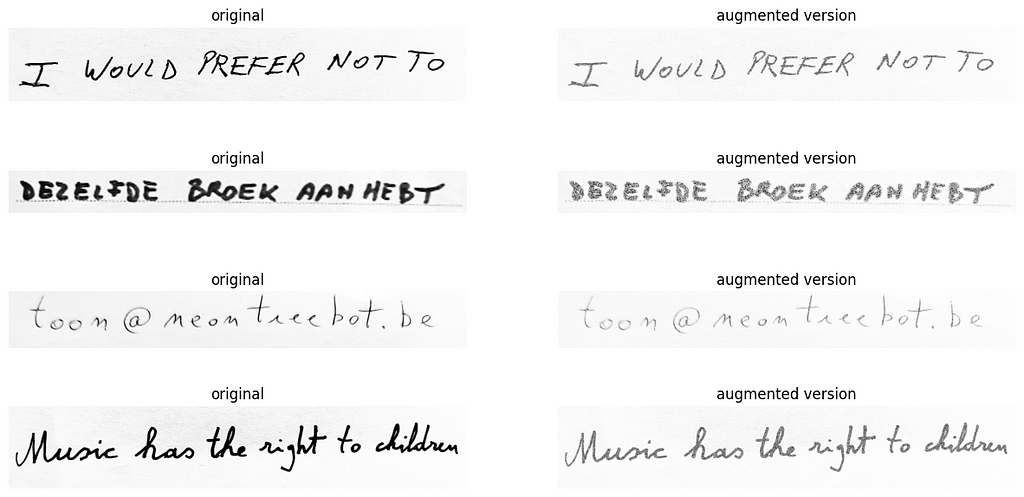
In a lesser extent PixelDropout to white does the same. But it results more in a more general faded image:
3rd augmentation technique: transformations
ShiftScaleRotate: be careful here with the parameters. Try to avoid that some text is cut off and falls outside the original dimensions. There is both a zoom and rotation going on. Be sure to not overdo it with too big parameters. Otherwise you’ll have more chance that the 1st sample will happen. You can see it actually moves text outside of the image. This can be prevented by choosing a larger bounding box — so effectively adding more whitespace around the text.

Blur. The old (but gold) reliable. Will be performed in different intensities.
The big finale: combining them all together:
This is where the power lies. We can randomly combine these effects to create unique images to include in each training epoch. Careful consideration needs to be taken that you don’t do too many methods of the same type. We can do this with the function in albumentation OneOf . OneOf contains a list of possible transformations and like the name implies, will only execute one of these with possibility P. So it makes sense to group transformations that do more or less the same, to avoid overdoing it. Here is the function:
import random
import cv2
import numpy as np
import albumentations as A

#gets PIL image and returns augmented PIL image
def augment_img(img):
  #only augment 3/4th the images
  if random.randint(1, 4) > 3:
      return img

  img = np.asarray(img)     #convert to numpy for opencv

  # morphological alterations
  kernel = cv2.getStructuringElement(cv2.MORPH_ELLIPSE,(3,3))
  if random.randint(1, 5) == 1:
    # dilation because the image is not inverted
    img = cv2.erode(img, kernel, iterations=random.randint(1, 2))
  if random.randint(1, 6) == 1:
    # erosion because the image is not inverted
    img = cv2.dilate(img, kernel,iterations=random.randint(1, 1))

  transform = A.Compose([

    A.OneOf([
      #add black pixels noise
      A.OneOf([
             A.RandomRain(brightness_coefficient=1.0, drop_length=2, drop_width=2, drop_color = (0, 0, 0), blur_value=1, rain_type = 'drizzle', p=0.05),
              A.RandomShadow(p=1),
              A.PixelDropout(p=1),
         ], p=0.9),

      #add white pixels noise
      A.OneOf([
              A.PixelDropout(dropout_prob=0.5,drop_value=255,p=1),
             A.RandomRain(brightness_coefficient=1.0, drop_length=2, drop_width=2, drop_color = (255, 255, 255), blur_value=1, rain_type = None, p=1),
        ], p=0.9),
    ], p=1),

    #transformations
    A.OneOf([
            A.ShiftScaleRotate(shift_limit=0, scale_limit=0.25, rotate_limit=2, border_mode=cv2.BORDER_CONSTANT, value=(255,255,255),p=1),
            A.ShiftScaleRotate(shift_limit=0.1, scale_limit=0, rotate_limit=8, border_mode=cv2.BORDER_CONSTANT, value=(255,255,255),p=1),
            A.ShiftScaleRotate(shift_limit=0.02, scale_limit=0.15, rotate_limit=11, border_mode=cv2.BORDER_CONSTANT, value=(255,255,255),p=1),
            A.Affine(shear=random.randint(-5, 5),mode=cv2.BORDER_CONSTANT, cval=(255,255,255), p=1)
       ], p=0.5),
    A.Blur(blur_limit=5,p=0.25),
  ])
  img = transform(image=img)['image']
  image = Image.fromarray(img)
  return image
P stands for the chance of something happening. It’s a value between 0 and 1, where 1 means it always happens and 0 never.
So, let’s see it in action:
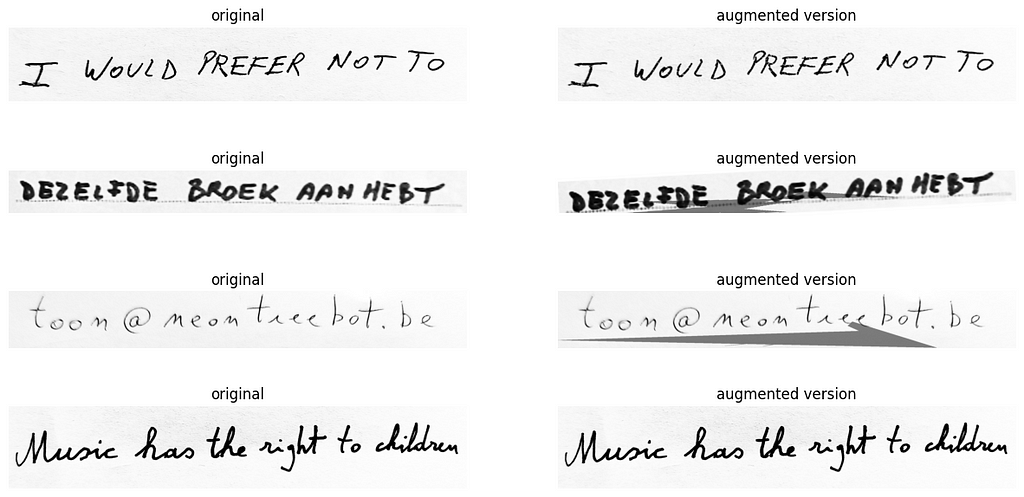
Looks pretty neat, no?
alternative approach: 🌮
In the EASTER 2.0 paper, they came up with the TACo technique. It stand for Tiling and Corruption. (🌮 haha)
It is capable of this:

I have not tried this out because my intuition tells me too much is destroyed from the original. In my opinion, if i can’t read it, a computer can neither. I might be wrong however, when you consider that as a human, you could guess it is ‘TACO’, if you see ‘TA█O’. We would look at the surrounding letters. and taco is a common word. But a computer with a dictionary behind it might make it ‘TAMO’, which happens to be an english word for ‘japanese ash’.
Conclusion
We’ve discussed many image manipulations and how they would be good for the task of OCR. I hope this could proof to be useful for you or at least gave you some inspiration to try it out yourselves. You can use my recipe as a baseline, but you’ll probably need to finetune a few parameters for it to be perfect for your dataset. Let me know how much your models have increased in accuracy!
I made the technique publicly available in this Jupyter notebook.
You may also like:
Hands-on: document data extraction with 🍩 transformer
References:
- Home - OpenCV
- Albumentations
- Research Group on Computer Vision and Artificial Intelligence - Computer Vision and Artificial Intelligence
- Easter2.0: Improving convolutional models for handwritten text recognition
- GitHub - Toon-nooT/notebooks
Effective Data Augmentation for OCR was originally published in Towards Data Science on Medium, where people are continuing the conversation by highlighting and responding to this story.
from Towards Data Science - Medium
https://towardsdatascience.com/effective-data-augmentation-for-ocr-8013080aa9fa?source=rss----7f60cf5620c9---4
via RiYo Analytics


No comments