https://ift.tt/o4DA6Hq Querying a Graph Database Using TigerGraph and Golang Both Through the TigerGraph REST Endpoints and TigerGo Image...
Querying a Graph Database Using TigerGraph and Golang Both Through the TigerGraph REST Endpoints and TigerGo

Overview
Introduction
Recently, I learned the basics of Go (Golang) and decided to build a TigerGraph Go package called TigerGo with my newfound knowledge. In this blog, I will walk through the basics of using the new library and how to create query a TigerGraph graph database with Go.
Tools
- TigerGo (v0.0.2): A new TigerGraph Go wrapper created today to interact with a TigerGraph graph database with Go.
- TigerGraph Cloud: Create and host a TigerGraph solution for free
- Go: A language created by Google.
Part I: Create and Prepare a TigerGraph Solution
Step I: Create a Solution
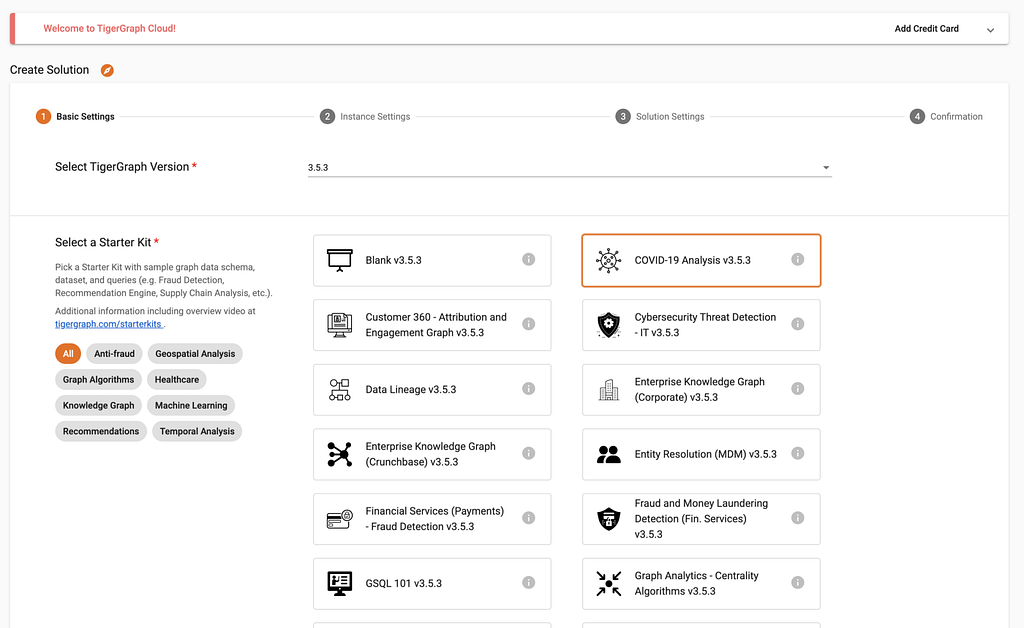
To start, create a TigerGraph solution on TG Cloud. There, navigate to the “My Solutions” tab then press the blue “Create Solution” button.

On the first page, select any of the starter kits. For this example, I will be using the COVID-19 Analysis Starter Kit.
Leave the second page as is; this will set up a free TigerGraph instance. On the third page, configure the solution appropriately.
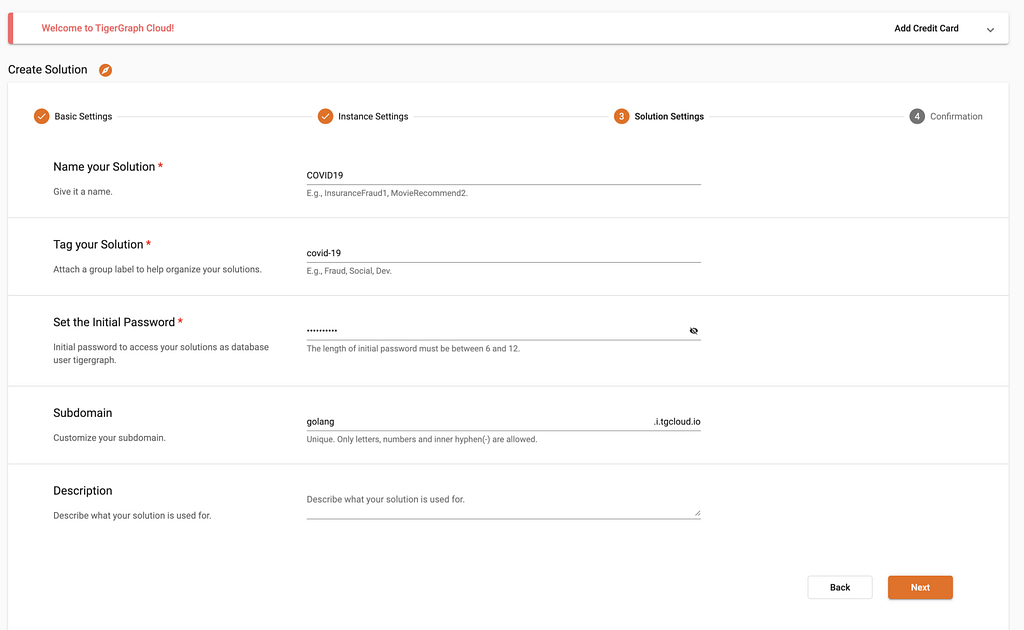
Note: Keep note of your subdomain and inital password!
Finally, on the last page, verify all the information is correct then press “Submit”! You will have to give the solution a few minutes to start up.
Step II: Load the Data
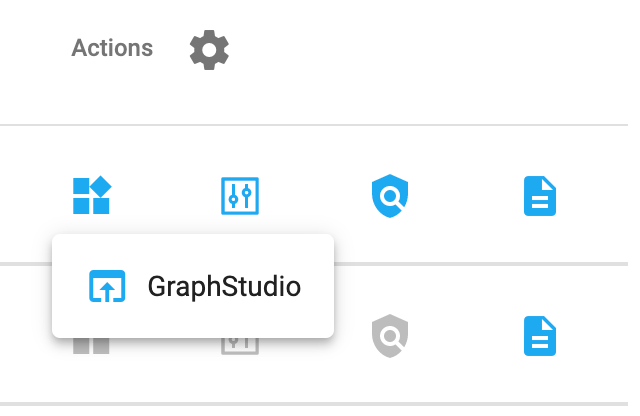
Once the solution is up and running, launch GraphStudio by clicking the “Applications” button and then “GraphStudio” from the dropdown. You may need to log in once it is launched.
In GraphStudio, click into “MyGraph” in the top left corner, navigate to the Load Data, then press the play button to load all of the data.
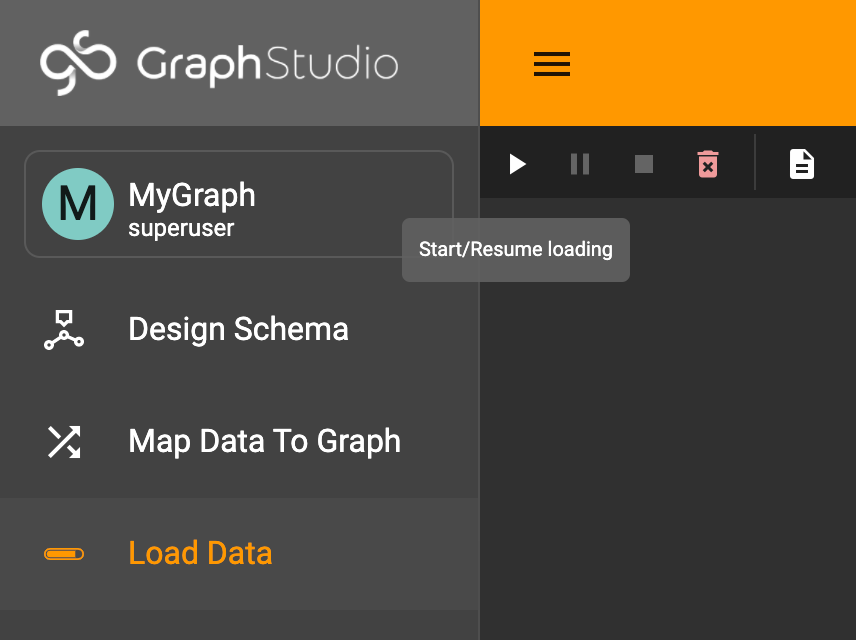
Perfect! With that, you are ready to interact with the solution in Go!
Part II: Create a Go Project and Import TigerGo
Step I: Import the Package
With the information created, you will next want to create a new Go project and then import the TigerGo package. First, create a new Go project:
mkdir GoProject && cd GoProject
go mod init GoProject
Next, create a main file for the code and import the library, github.com/GenericP3rson/TigerGo.
package main
import(
   "fmt"
   "github.com/GenericP3rson/TigerGo"
)
func main() {
// Main code will be here
}
Note: When using Visual Studio Code, the above code will automatically delete the imports because they are not used.
You can then import the library in two ways. You can either manually get the package with:
go get github.com/GenericP3rson/TigerGo
Alternatively, you can have the go mod automatically import it with:
go mod tidy
Note: TigerGo is in its experimental phase, and will experience development after this blog. However, the general syntax should remain the same, mirroring pyTigerGraph.
Step II: Create the Connection
First, start out by creating a TigerGraphConnection. This will require the username (which defaults to “tigergraph”) and password of your solution, the graph name, and your host. This also requires a token, but you can leave it empty, create a token calling GetToken, then fill in the token.
package main
import(
   "fmt"
   "github.com/GenericP3rson/TigerGo"
)
func main() {
conn := TigerGo.TigerGraphConnection(
      Token: "", // Leaving it empty for now
      Host: "https://SUBDOMAIN.i.tgcloud.io",
      GraphName: "GRAPHNAME",
      Username: "tigergraph",
      Password: "PASSWORD"
)
fmt.Println(conn.GetToken())
}
For my example, the code will look like this, with the password redacted:
package main
import(
   "fmt"
   "github.com/GenericP3rson/TigerGo"
)
func main() {
conn := TigerGo.TigerGraphConnection(
      Token: "", // Leaving it empty for now
      Host: "https://golang.i.tgcloud.io",
      GraphName: "MyGraph",
      Username: "tigergraph",
      Password: "PASSWORD"
)
fmt.Println(conn.GetToken())
}
Once a token is generated, replace it under token, as it is necessary for all the other functions to work.
package main
import(
   "fmt"
   "github.com/GenericP3rson/TigerGo"
)
func main() {
conn := TigerGo.TigerGraphConnection(
      Token: "TOKEN",
      Host: "https://golang.i.tgcloud.io",
      GraphName: "MyGraph",
      Username: "tigergraph",
      Password: "PASSWORD"
)
}
Perfect! With this, you are now ready to start running commands.
Part III: Commands
Vertex Commands
There are several TigerGo functions for retrieving and manipulating vertices. For instance, with TigerGo, you can get all vertices of a certain type. For example, if you wanted to grab all the Patient vertices, you can do so with:
conn.GetVertices("Patient")
The REST equivalent queries the /graph/{graph_name}/vertices endpoint.
client := &http.Client{ Timeout: time.Second * 10, }
req, err := http.NewRequest("GET", fmt.Sprintf("%s:9000/graph/%s/vertices/%s", HOST, GRAPHNAME, vertex_type), nil)
if err != nil { return err.Error() }
req.Header.Set("Authorization", "Bearer "+TOKEN)
response, err := client.Do(req)
if err != nil { return err.Error() }
Edge Commands
Similarly, TigerGo provides functions involving edges. For example, say I wanted to see how a patient interacted with their surrounding. To do so, I can grab all the edges connected to the patient.
conn.GetEdges("Patient", "SOME_PATIENT_ID")
The REST equivalent will make a request to the /graph/{graph_name}/edges endpoint.
client := &http.Client{ Timeout: time.Second * 10, }
req, err := http.NewRequest("GET", fmt.Sprintf("GET", fmt.Sprintf("%s:9000/graph/%s/edges/%s/%s/_", HOST, GRAPHNAME, source_vertex, source_vertex_id), nil)
if err != nil { return err.Error() }
req.Header.Set("Authorization", "Bearer "+TOKEN)
response, err := client.Do(req)
if err != nil { return err.Error() }
Query Commands
Finally, using the TigerGo package, you can run installed queries. The COVID-19 starter kit comes with many pre-installed queries. For example, let’s run ageDistribution, a query that returns the age distribution of the patients.
Note: Make sure ageDistribution is installed before running the query.
conn.RunInstalledQuery("ageDistribution")
The REST API version sends a GET request to /graph/{graph_name}/{query_name}.
client := &http.Client{ Timeout: time.Second * 10, }
req, err := http.NewRequest("GET", fmt.Sprintf("%s:9000/query/%s/%s", conn.Host, conn.GraphName, queryName), nil)
if err != nil { return err.Error() }
req.Header.Set("Authorization", "Bearer "+TOKEN)
response, err := client.Do(req)
if err != nil { return err.Error() }
Part IV: Conclusions, Resources, and Next Steps!
And that’s a quick introduction to TigerGo! Want to make a contribution? Feel free to make a pull request to the repo!
GitHub - GenericP3rson/TigerGo
Interested in Go? I previously wrote a blog about getting into Go and creating a package that you can check out!
Creating and Deploying your First Go Package
Interested in creating your own TigerGraph wrapper? Check out the full documentation of the official endpoints here.
Built-in Endpoints - TigerGraph Server
Finally, if you have any questions or would like to chat with TigerGraph developers while developing projects, join the Discord!
Join the TigerGraph Discord Server!
Note: All images, unless otherwise indicated, were created by the author.
An Introduction to Using TigerGraph with Go: Exploring COVID-19 Patient Cases was originally published in Towards Data Science on Medium, where people are continuing the conversation by highlighting and responding to this story.
from Towards Data Science - Medium https://ift.tt/oIOb5Up
via RiYo Analytics


ليست هناك تعليقات