https://ift.tt/Slecp5y Kubeflow MLOps : Automatic pipeline deployment with CI / CD / CT Create an advanced Kubeflow pipeline, and automate...
Kubeflow MLOps : Automatic pipeline deployment with CI / CD / CT
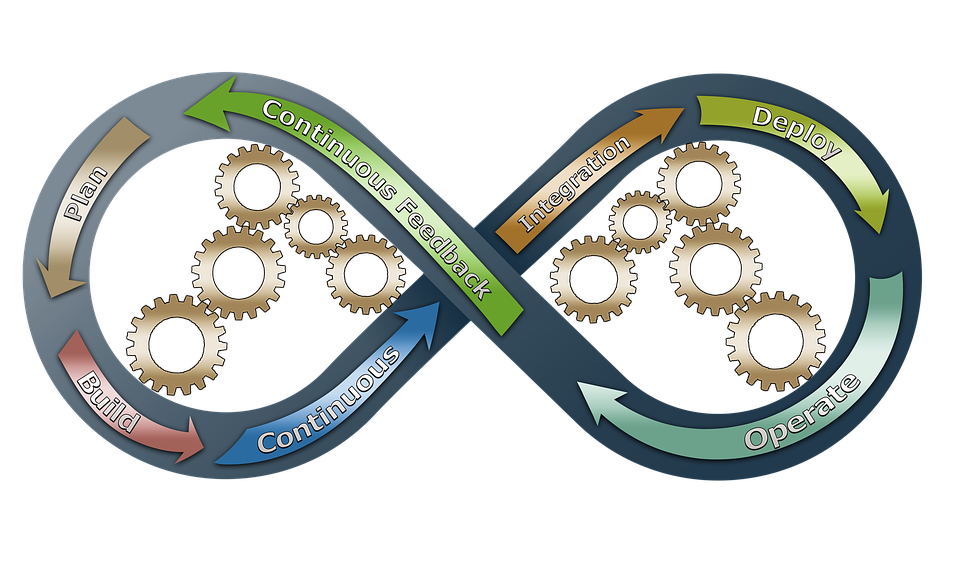
Create an advanced Kubeflow pipeline, and automate its deployments and updates with continuous integration, deployment and training
In my previous kubeflow article, we went through the following steps necessary to have a functioning pipeline :
- Create a Kuberneter cluster
- Install Kubeflow
- Create a container registry
- Build a container image and push it to your registry
- Give Kubeflow access to your S3 buckets
- Create Kubeflow components with input and output artifacts
- Create a Kubeflow pipeline, upload it and run it
If you already have a functioning Kubernetes cluster with Kubeflow installed on it, you can directly follow this guide. If you don’t, I strongly recommend checking my previous article.
This time, we’ll go a step further and :
- Make an advanced pipeline that contains pre-processing, model building, inference and performance evaluation
- Use GitHub Actions to perform CI and CD
- Connect GitHub Actions to the Kubeflow endpoint and launch the updated pipeline
Source dataset and GitHub Repo
In this article, we’ll use the data from the Seattle Building Energy Benchmarking that can be found on this Kaggle page and build a model to predict the total greenhouse effect gas emissions, indicated by the column TotalGHGEmissions.
This dataset is made of two tables, which are observations from 2015 and 2016. We’ll store them on an S3 bucket on which our pipeline will source itself. If you followed my previous article, your Kubeflow server should have access to your bucket.
All of the code shown in this guide is available in this public repository.
Advanced Pipeline — Step 1 : Components
If you already know how to create Kubeflow components and pipelines, you can directly go to the “Upload the Pipeline” chapter of this article.
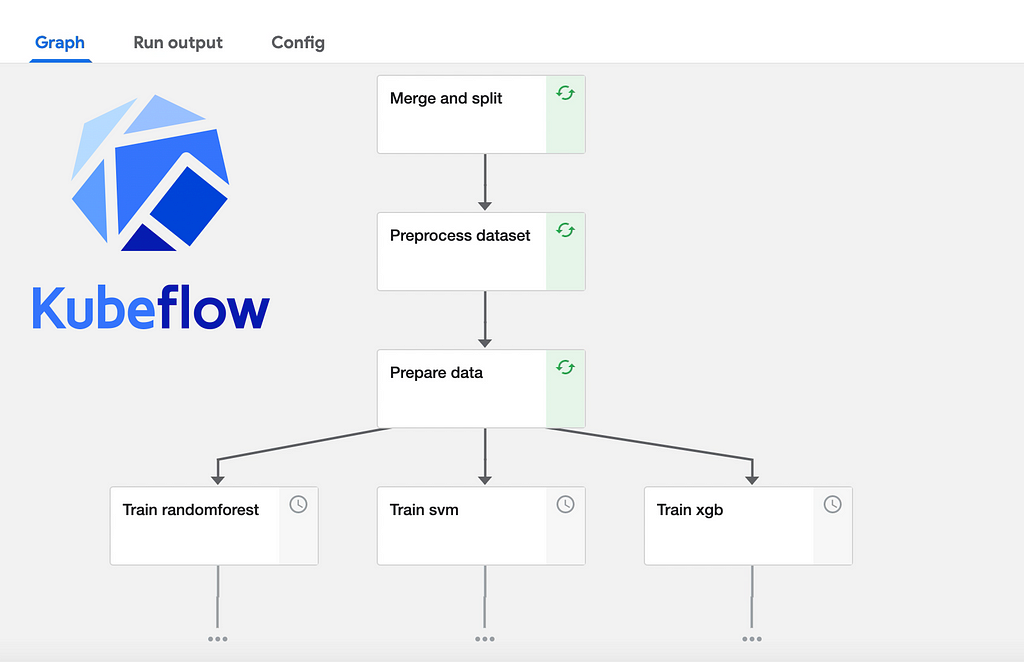
Our pipeline will have the following steps :
- Merge the data from 2015 and 2016 and split the result into a training set and testing set
- Data cleaning, NaN filling and feature engineering
- Data preprocessing and preparation
- Model building : SVM, RandomForest and XGBoost
- Evaluate results, select best model, train it and save it
- Predict
Once again, all of these steps’ codes can be found in the kf_utils folder of my repo, but let’s detail one of them so we can have a better understanding of Kubeflow’s “grammar” :
So what’s happening here ?
The first thing we do is to import the packages we need to describe the op, and define the evaluate_models() function that will become the op.
The structure is :
def function(input_1 : type, input_2 : type, …) -> Output
Here, the output is a Named Tuple, in which you can declare the several elements that constitute the op’s output. These are the names you will later have to use in your code to save the artifacts.
Note that for classic outputs like csv files, this simplified structure is enough :
import kfp.components as comp
def function(input_1 : type, input_2 : type, …,
             csv_output : comp.OutputPath('csv')
After that, we import the packages that will be necessary for this component, such as matplotlib. The reason why the imports are made inside of the function and not before are explained in my first article.
I also define my easy_bar_plot function ; note that a good practice would be to have it defined in a module inside of the repo, but here I made it directly in the function for a better readability of the snippet.
The performances and best hyperparameters, which are artifact outputs of the previous Kubeflow compenents, are stored in dictionaries and plotted. The plots are saved and the best model is selected based on the best R2 score.
Since Kubeflow doesn’t yet accept any kind of plot as an artifact output, a workaround solution is to upload the plots to the s3 bucket, which is what we do in lines 116 and 119.
Now, when I defined the function I specified the output as the Named Tuple : NamedTuple('Outputs', [('best_model' : str), ('hyperparams' : dict)]).
Kubeflow will understand that my artifact output is made of 2 elements, and therefore expects the op function to return 2 objects.
In line 123, we do indeed have 2 objects returned :
return (best_model, best_models_hyperparams)
best_model being the first object returned, it will be matched to the first element of the NamedTuple, and automatically considered a string by Kubeflow.
The last block of code is here to convert the python function to the actual Kubeflow op in the form of a yaml file with the create_component_from_func function, which takes as parameters the function to convert, the output path, and a base docker image. Here, I provided a light public image I created, and if you read my previous article, you should know how to make one by now.
In my repo, all of my Kubeflow components (their .py files and the resulting .yaml files) are stored in the kf_utils directory.
Advanced Pipeline — Step 2 : from components to pipeline
Once all the components making the above-mentioned steps are created, you can create the following pipeline. I won’t go too much into detail here since I already talked about pipeline creation in my last article.
We’ll save this code in the “pipeline” directory.
Upload the pipeline
We will now need to upload this pipeline to Kubeflow. What we’ll upload is not the python file but a compiled yaml file that is created with the shell command :
dsl-compile --py pipeline/pipeline.py --output pipeline/pipeline.yaml
We now have the pipeline yaml in the “pipeline” directory. In my previous article, I showed you how to upload it to Kubeflow using the Central Dashboard but here we’ll do it from a python command.
This is where it gets tricky. The easiest, most platform-agnostic way to connect to the Kubeflow pipelines manager is to open a client session like so :
client = kfp.Client(host=host, cookies=cookies)
The kfp.Client() function takes two parameters, which are :
- The kubeflow host endpoint which should look like this :
123-isitiosystem-istio-2af2-456.us-west-2.elb.amazonaws.com/pipeline
which is your Central Dashboard’s URL followed by /pipeline - An authentication cookie that is stored in your browser when you log into your Central Dashboard with your login and password
You can copy and paste your cookie value in your code to open the client session but that means leaving it in the clear for everyone to see, plus the cookie inevitably expires. To compensate for that, we’ll use beautiful soup to log into the Dashboard and retrieve the cookie.
In the end, we’ll want to use GitHub actions to launch the pipeline — that means that the login, password and URL can be saved as secrets and passed to the python script as environment variables. Our pipeline launch script will therefore look like this :
Running this script will create — or update — and launch your Kubeflow pipeline. Note that for that to work you need to have already created an Kubeflow experiment, but this is easy to do in the Central Dashboard and they are reusable.
On my repo, this script is called run_pipeline.py and is in the main directory.
We now have all the tools necessary to have a fully automated process.
Automation — Step 1 : prepare the GitHub secrets
The run_pipeline.py script will use 4 secret values :
- URL : Your Kubeflow server URL, which should look like this :
123-isitiosystem-istio-2af2-456.us-west-2.elb.amazonaws.com - ENDPOINT : The kubeflow host endpoint which should look like this :
123-isitiosystem-istio-2af2-456.us-west-2.elb.amazonaws.com/pipeline - EMAIL and PASSWORD : your Kubeflow Dashboard Center logs
Go to your GitHub repo and go to Settings, then Secrets :
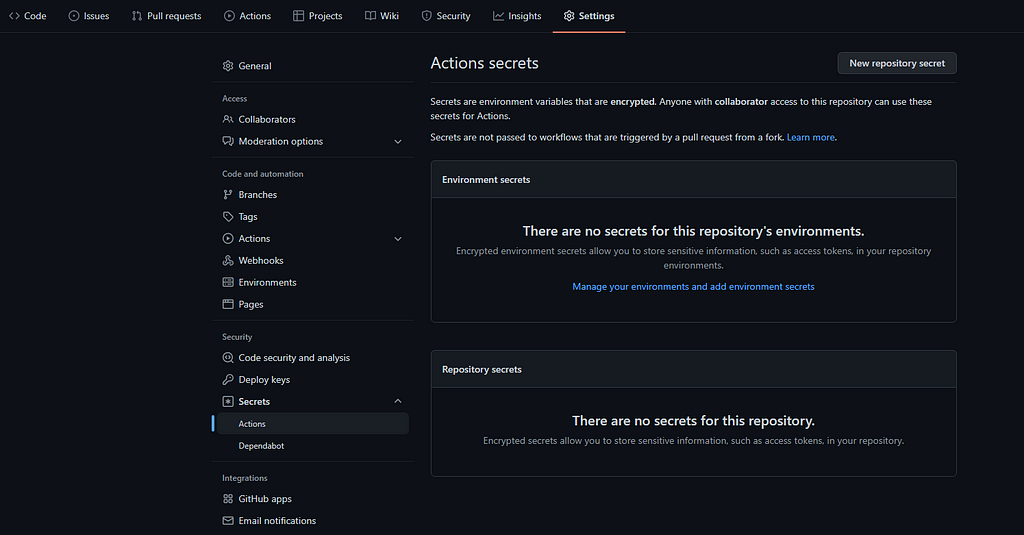
From there, add your secrets. Let’s call them respectively KBFL_URL, KBFL_ENDPOINT, KBFL_LOGIN, and KBFL_PASSWORD.
Automation — Step 2: setup GitHub Actions
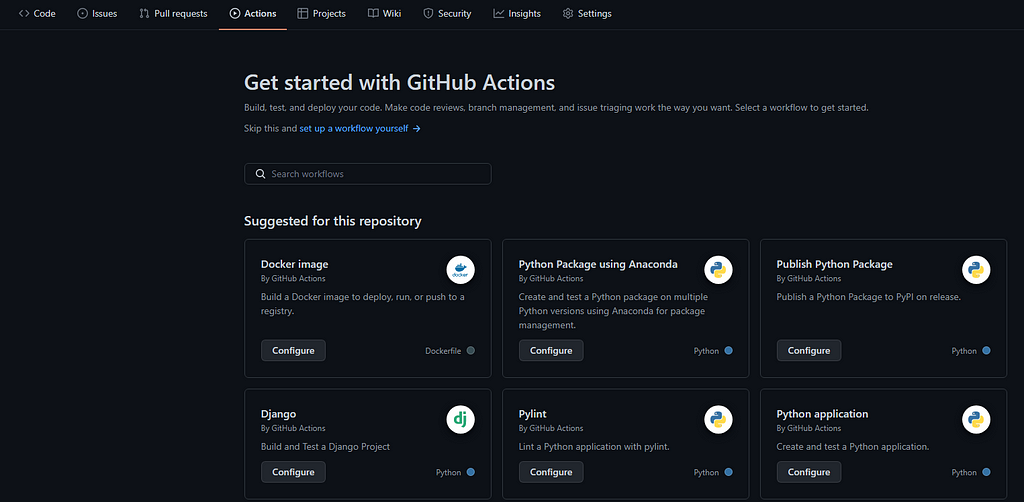
On your repo and click on Actions. You should have suggested actions displayed on this page. Choose any one of them, for instance the one called “Python Application” and click on “configure”.
In the following configuration window, replace the yaml code with this :
What this action does it that on each commit or merge request on the main branch, GitHub Actions will create an environment, install python and its dependencies on it, install kfp, rebuild the pipeline with dsl-compile , and launch the run_pipeline.py script with the proper environment variables imported from the GitHub secrets.
While building all of these assets, GitHub actions will perform the CI / CD steps and any incoherence in the Kubeflow pipeline will be detected during the dsl-compile step and return an error.
If you want to implement continuous training (CT), you can change the client.run_pipeline() call in the run_pipeline.py script with client.create_recurring_run() .
And there you have it ! When you need to modify any component of the pipeline, you can create a branch, modify the component, run the component script to recreate the op, commit and create a merge request. GitHub will recreate and upload the pipeline and launch it on Kubeflow, it’s all automated.
Next steps
The automation here is not really a proper CD and CT in terms of MLOps good practices, but you now have all the necessary tools to do that.
From there, the next steps would be to have only one model that is periodically retrained with client.create_recurring_run(), which would make what we just built your training pipeline.
You should then create an inference pipeline that only loads the model and makes predictions, which would allow you to set up another type of recurring — or on-demand — runs, without having to retrain the model every time. Finally, you should also have a monitoring pipeline that triggers the training pipeline when it detects a drop in the model’s performance.
You can also add a performance criterion in your CD so that your GitHub action only succeeds when a newly added feature improves the performance of the model.
Kubeflow MLOps : Automatic pipeline deployment with CI / CD / CT was originally published in Towards Data Science on Medium, where people are continuing the conversation by highlighting and responding to this story.
from Towards Data Science - Medium https://ift.tt/b95EszB
via RiYo Analytics


No comments