https://ift.tt/3FprGH1 How to set up a PySpark development environment with Docker and Jupyter Notebook Leave the configuration work for D...
How to set up a PySpark development environment with Docker and Jupyter Notebook
Leave the configuration work for Docker and start writing PySpark code

Apache Spark is one of the most commonly used tools in the day-to-day job of data scientists worldwide. Spark is so ubiquitous that any Data Scientist could benefit from being familiar with its API and best practices.
If you need to handle vast amounts of data from multiple sources or interact with enterprise Data Lakes, the chances are that you are using Spark in some shape or form in your data processing pipeline. And, if you are a beginner, you're certainly having a hard time setting up an environment to run your PySpark scripts.
This article will show you an easy way to get a fully functional PySpark environment up and running so you become more comfortable.
But, before we start, let's go over a few of the requirements for you to follow along:
- About 3.5 GB available in your machine;
- Having Docker installed;
- For Windows and/or macOS users: make sure to have the Docker Desktop app is Running (green light) when going through the steps in this tutorial.
By the end of the article, we will have an isolated environment running on a Docker container with a fully functional PySpark installation and access to your computer's local files, all from a single terminal command.
Step 1: setting up Docker for development environments
A Docker container is a sort of pre-configured virtual machine (1). Developers and other professionals can write a configuration file (a Dockerfile) that contains a set of instructions on how to build this virtual machine from scratch, from which operating system to choose to what python packages to install on it.
Anyone can use the docker buildcommand and reproduce this virtual machine in their local environments with this file on hand.
The open-source community loves Docker due to its flexibility, and it is also widely used in industry. For Data Science work, this is not any different. It goes a long way to learn your way around the Docker ecosystem.
With such popularity, it is easy to find pre-built docker images on the internet in special repositories like Docker Hub. Fortunately, folks from Project Jupyter have developed a series of docker images with all the necessary configurations to run PySpark code on your local machine. We will use the image called jupyter/pyspark-notebook in this article.
The first step is to download and install this image. We can do this with a docker pull command.
# downloading the required image
docker pull jupyter/pyspark-notebook
If everything works well, the line above should start downloading the specified docker image and installing it on your computer. We are then able to run it from the command line using docker run name-of-the-image .
However, we will change the process a bit to make it simpler to interact with the Docker environment.
Step 2: running the PySpark docker image smartly
Apps running on Docker containers are typically designed to be self-contained experiences. They don't usually have access to data on the host machine, amongst other limitations. Similarly, the host machine, by default, does not have direct access to the data generated inside the container's context.
In our case, we want to interact with the Jupyter Notebooks we create inside this Docker environment and move files in and out of it.
The nasty command below shows how to do this kind of setup. Fear not. I will explain every bit of the configuration to clarify what we are doing.
# if running on Windows (cmd.exe):
docker run -it -p 8888:8888 -v %cd%:/home/jovyan/work/projects/ jupyter/pyspark-notebook
# if running on a mac or linux computer:
docker run -it -p 8888:8888 -v `(pwd)`:/home/jovyan/work/projects/ jupyter/pyspark-notebook
Understanding the setup
When we use docker run , we can pass several parameters to it that control how we engage with the container. The arguments that follow the docker run statement are these lower-level controls.
The first one is -it . It means that we want to run the container in interactive mode. -itallows us to see the command's output that the docker container is programmed to execute when running it. In this case, it just runs jupyter notebook So we will be able to see the result of running the jupyter notebook command, which will be necessary later since we will copy some info that gets printed to the terminal window and paste it into our browser.
The second part of the command is -p 8888:8888 . -p means "publishing." The parameter "maps" (2) one network port from the container to a network port in the host machine. In this case, we are mapping the port 8888 in the host machine to the port 8888 in the container. The syntax is -p {host's port}:{container's port} .
In practice, this means that when we open our local machine at port 8888 (localhost:8888), we will see whatever the container is sending to the same port on the screen.
When we run the container with this parameter, a Jupyter Notebook server in our computer will be accessible like the same as when we run jupyter notebookfrom the regular command line.
Finally, we have the -v parameter, which stands for volume. It works almost the same way as the -p case and has a similar syntax. While in the first case, we were mapping network ports, we are now mapping volumes, which is Docker's way of saying "file directories." When we pass the parameter, -v (pwd):/home/jovyan/work/projects/ we are telling Docker to map the (pwd) (3), which is the present working directory (in other words, where your terminal is currently at) to the /home/jovyan/work/projects/ directory in the container.
Now we can access the current directory directly from our Jupyter Notebook interface or the command line inside the container, making it a lot easier to move files around.
Step 3: Accessing the PySpark environment
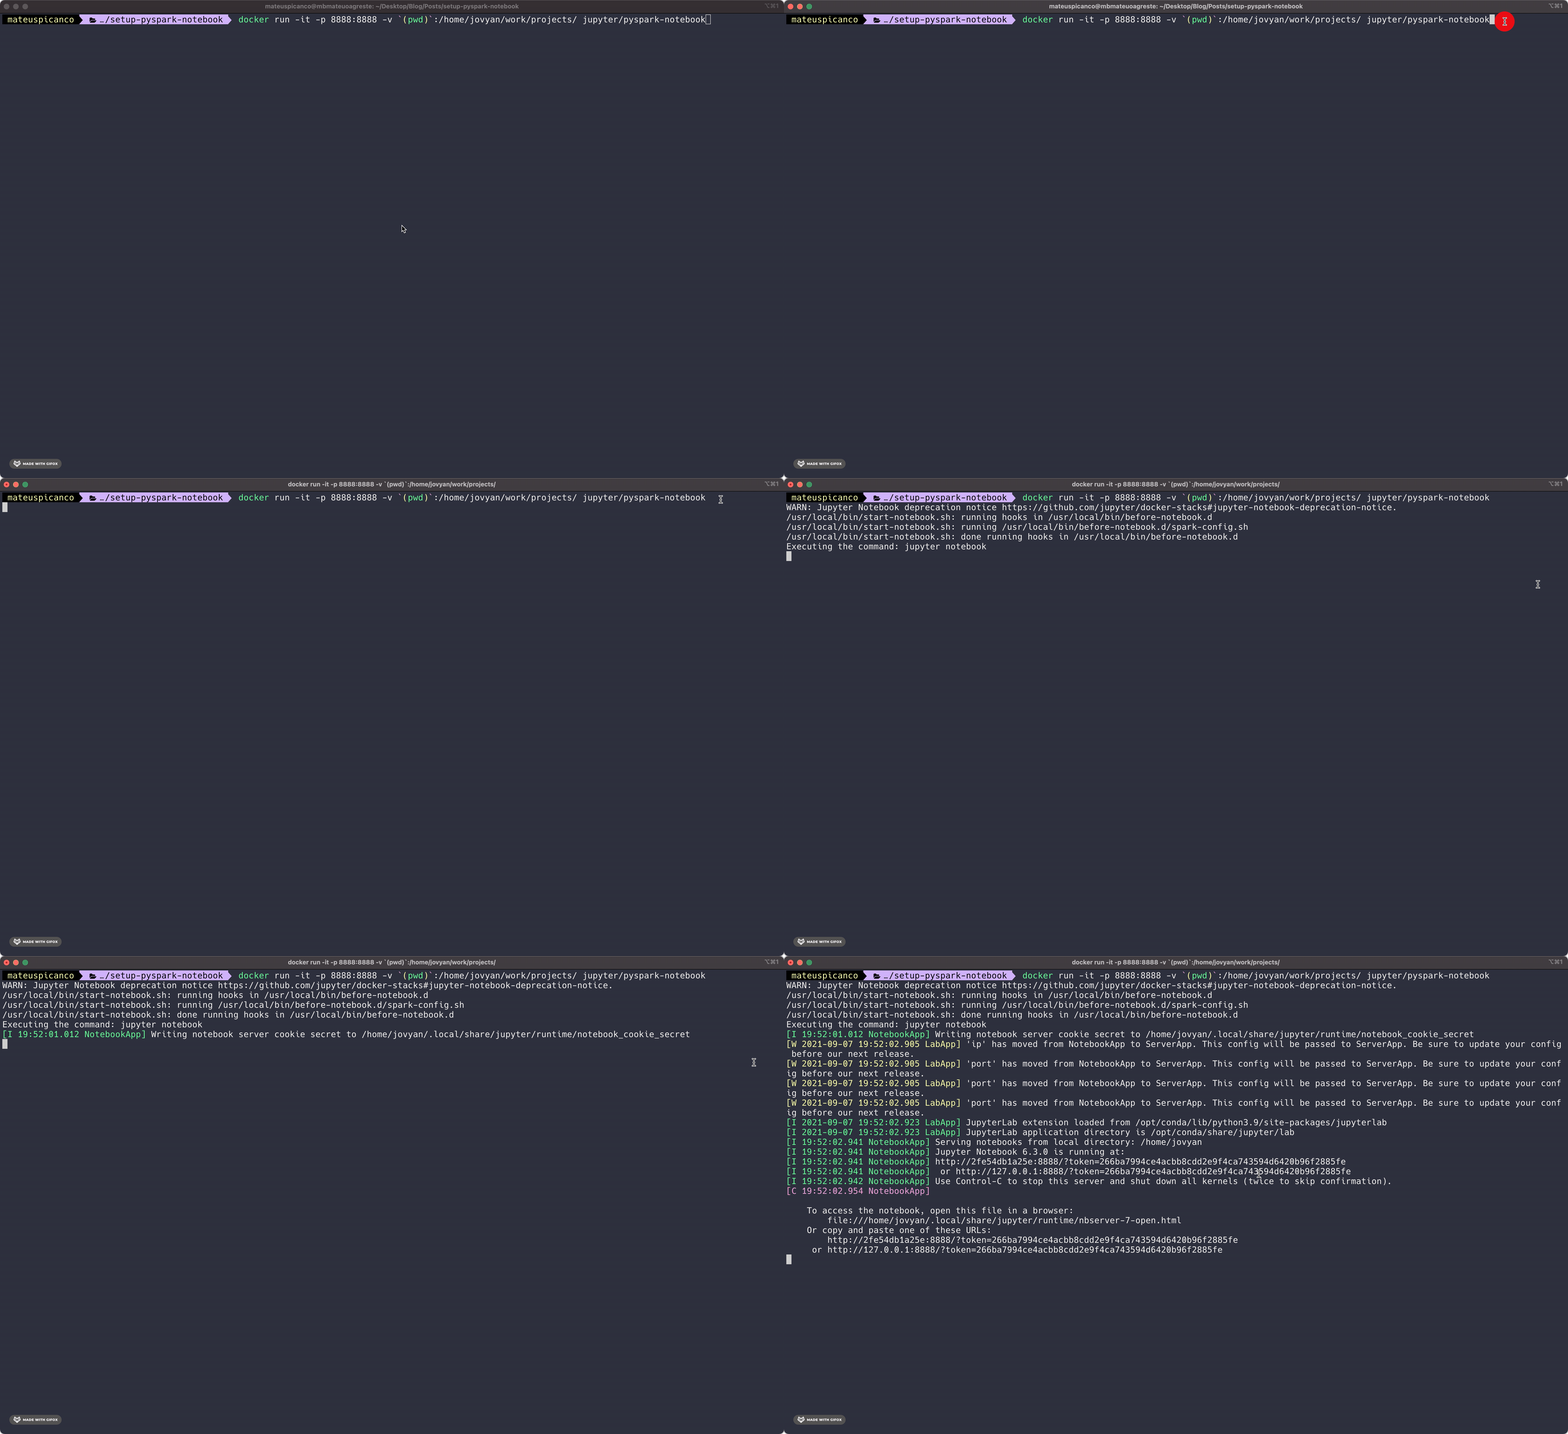
When we run the entire command as described, we get an output like below.

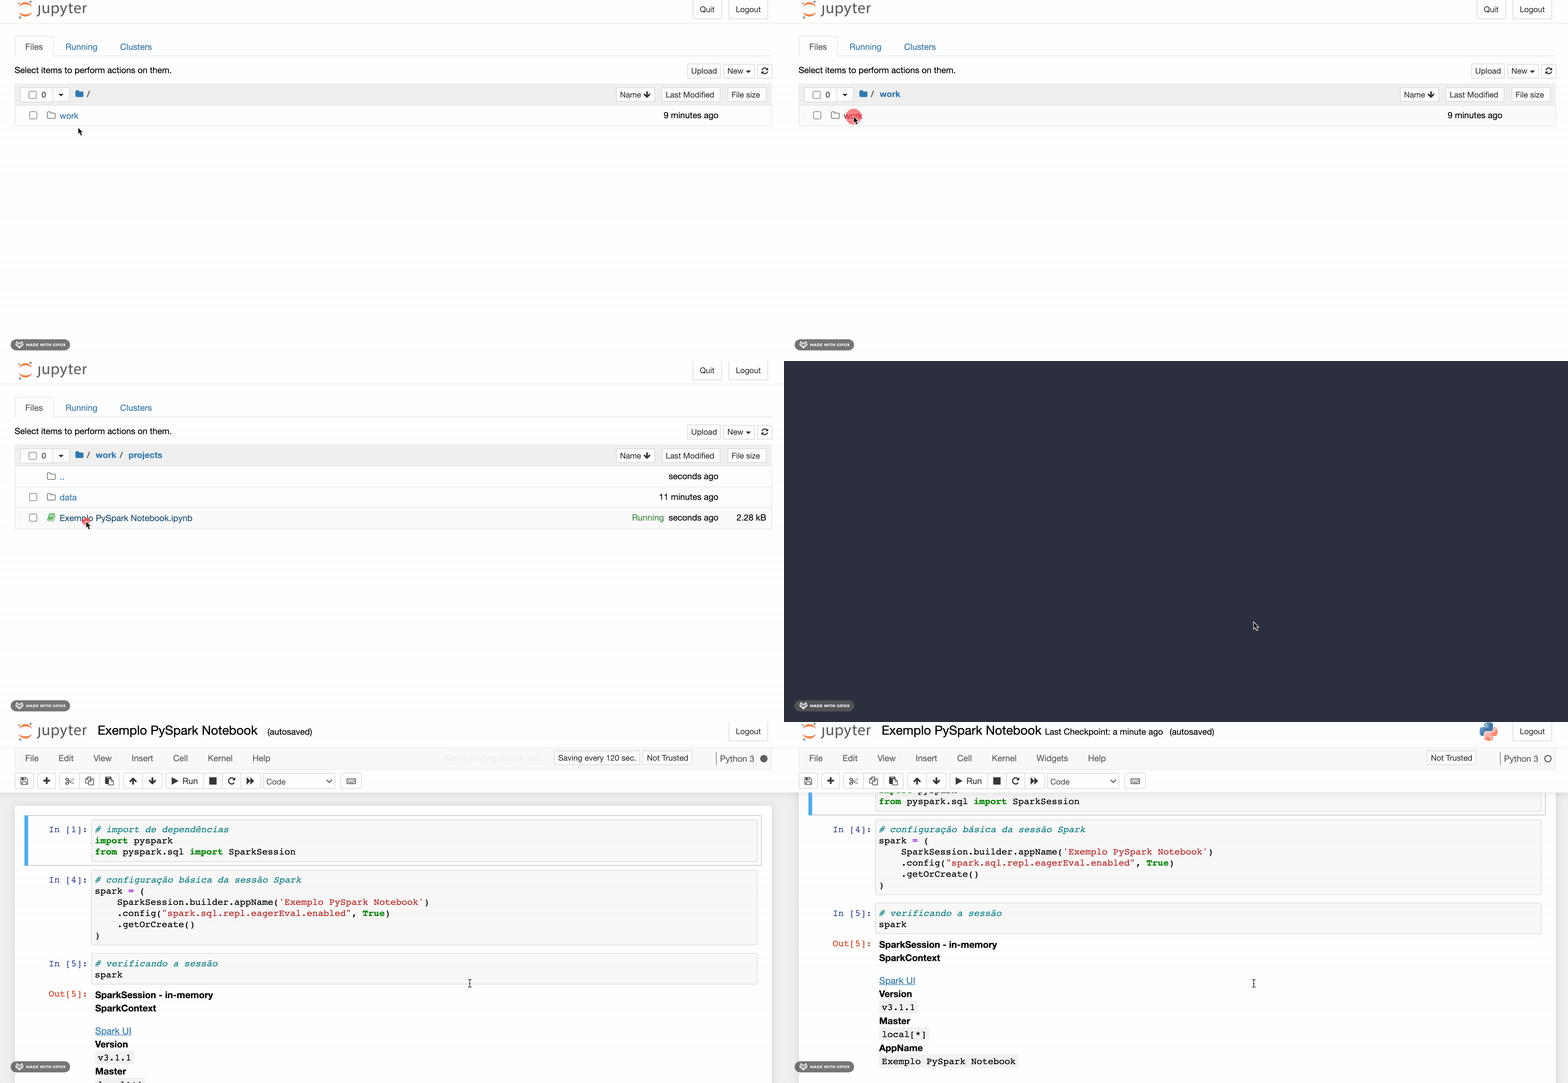
The last bit of the result contains an access token right after the ?token= . Copy this whole line and paste it into your browser. You should now see the familiar jupyter notebook interface.

We now have a fully functional PySpark environment running on Jupyter for you to start learning more about this popular tool.
Bonus tips for those who got here
If you're macOS or Linux user, there is a neat way to wrap the command above into a bash function or an alias so that you don't have to copy and paste the line above every time.
In your .zshrc or .bashrc , add a function definition like the one below:
# defining a wrapper function for running the command
run_spark() {
   docker run -it -p 8888:8888 -v `(pwd)`:/home/jovyan/work/projects/ jupyter/pyspark-notebook
}
# on the command line then run this to update your profile:
source ~/.zshrc
# or
source ~/.bashrc
If you now run run_spark in your command line, you get the same results as discussed above.
Windows users: I will add it to this article when I figure out a simple way to do something similar.
If you want to learn more about PySpark for Data Science
Feel free to follow me on Medium for fresh content every week!
Footnotes
- (1) This is an oversimplification of the concept of Docker containers, but it is still a good analogy for the article.
- (2) Mapping is also not really what is going on in the -p parameter, but thinking of it as a map of relations between ports helps understand how information is flowing.
- (3) We have the same idea for Windows users, but we switch (pwd)for %cd%.
Stuck trying to get PySpark to work in your Data Science environment? Here is another way. was originally published in Towards Data Science on Medium, where people are continuing the conversation by highlighting and responding to this story.
from Towards Data Science - Medium https://ift.tt/3FiBLFI
via RiYo Analytics

ليست هناك تعليقات