https://ift.tt/32CphtZ A silver platter guide to serving your models on AWS Photo by Kira auf der Heide on Unsplash Introduction Wha...
A silver platter guide to serving your models on AWS

Introduction
What do an iPhone photo library, an Amazon shopping basket and a Netflix home page all have in common?
One way or another, each of these applications interacts with a Machine Learning model to improve user experience and to better serve end users.
It is without doubt that machine learning has fundamentally transformed how we interact with technology today and will continue to do so in years to come.
My journey into the world of data science has taught me that training a ML model is really only part of any ML solution. Most data enthusiasts are capable of training a model but to deploy that model in order to make it useful is a whole other challenge.
By the end of this guide, I will help you answer the questions I have asked myself countless times:
How do I deploy my Machine Learning models?
How do I serve my models?
I will help you take your first steps into the growing field of Machine Learning Engineering by showing you how to deploy your ML models on AWS within a Docker container. Here are the key steps we will be taking to deploy our model on AWS Elastic Beanstalk.
- Train a RandomForest Classifier.
- Build a simple Flask app with an API endpoint.
- Containerise our application using Docker.
- Deploy the containerised application on AWS elastic beanstalk.
- Serving our model as an API.
Why AWS Elastic Beanstalk?
AWS Elastic Beanstalk is one of the many ways you can deploy a model and it is important to understand that there is no one size fit all solution.
Nonetheless, AWS Elastic Beanstalk offers several advantages when deploying a model in the cloud.
First, Elastic Beanstalk makes it quick and easy for developers to deploy applications in the web by taking away the complexities associated with managing the underlying infrastructure for web services. The configuration and provisioning of AWS services such as EC2 instances, Elastic Load Balancing and system health monitoring are automated in Elastic Beanstalk. This allows developers to concentrate on developing. Secondly, Elastic Beanstalk has wide support for many language such as Java, .NET, PHP, Node.js, Python, Ruby, Go and most importantly Docker containers.
As with any technology, there are always disadvantages. One thing to keep in mind is that your application will be running 24/7. Depending on the project requirement, 24/7 implementation of your application could be an advantage or a significant cost-burden. Unlike AWS Lambdas, there is no option for an “on demand” implementation of your application on Elastic Beanstalk. Furthermore, the lack of log files on Elastic Beanstalk can make failed deployment difficult to debug, thus, development can be more difficult.
Still here? Then let’s begin.
Contents
- Pre-requisites
- Setting up AWS CLI credentials
- Model training
- Building a Flask API
- Docker containerisation
- Testing the Flask application
- Deploying on AWS Elastic Beanstalk
- Serving our model as an API
- AWS resource termination
- Final remarks
Pre-requisites
There are some key pre-requisite that you will need before moving forward. We will be interacting with quite a few tools, so do spend some time getting the pre-requisites installed.
- You will need an AWS account. You can sign up to the free tier which will be automatically applied on sign up.
- Some technical knowledge in navigating command line.
- AWS Elastic Beanstalk CLI
- Docker
- Python 3.9.7
- VS Code or any of your preferred Python IDE.
- Poetry — Python package management tool (Read my previous post on getting set up with Poetry)
- Python libraries: scikit-learn, numpy, requests, pandas, flask, joblib and json. You can install my current python build using Poetry, alternatively the requirements.txt file is included in the Git repository.
- All the code used for this project can be found on GitHub linked here.
AWS_ElasticBeanstalk_deploy
├── Dockerfile
├── README.md
├── documentation.ipynb
├── models
│   └── rf_clf.joblib
├── poetry.lock
├── pyproject.toml
├── requirements.txt
└── scripts
    ├── eb_predict.py
    ├── flask_api.py
    ├── predict.py
    └── train_iris_rf.py
Great! After signing up for AWS and installing all the pre-requisites you can proceed to the set-up part of this guide.
Building a simple Flask API
Now we are all set-up, let’s get coding. In general, here are the steps we will be taking to deploy our model on AWS.
- Train a RandomForest Classifier.
- Build a simple Flask app with exposed API endpoint.
- Containerise our application using Docker containers.
- Deploy the containerised application on AWS Elastic Beanstalk.
- Serving our model as an API.
1. Model training
Let’s train a very simple RandomForest Classifier with the Iris dataset and serve it with a Flask API.
We will be using the sklearn python library to load the Iris dataset and to train our model.
The model will be serialised with joblib and saved in the models folder which can be called in the Flask application.
2. Build a Flask API
Next, let’s build a Flask API application with a /predict endpoint.
As shown in the main block of code below, the /predict endpoint will execute the predict_endpoint() function which calls the Random Forest model and return the predictions as a response. In more detail, the predict_endpoint() function parses a json object into a numpy array, makes a prediction and returns the response as a json.
@app.route('/predict', methods=['POST'])
def predict_endpoint():
   test_data = request.get_json()
   test_data = np.array(test_data)
   predictions = model.predict(test_data)
   response = json.dumps(predictions.tolist())
   return Response(response,
                   status=200,
                   mimetype="application/json")
Code within the if __name__ == ‘__main__': block are executed before the Flask app is initialised. Therefore, the code to load the serialised model will start here with model = joblib.load('rf_clf.joblib').
if __name__ == '__main__':
   model = joblib.load('rf_clf.joblib')
   app.run(host='0.0.0.0', port=8080)
3. Docker containerisation
We will be containerising the Flask application using Docker. There are many advantages in using Docker. One being the maintenance of consistency in build environments across machines.
This consistency allows you to test your containerised application on your local machine and deploy it in any system where Docker is running, with the knowledge that it will perform exactly as it did when tested locally.
I will also be using Poetry in Docker to lock down package dependencies to ensure that identical builds are mirrored across machines. I will not go into too much detail on the commands in Docker, but in general these are the steps laid out in the Dockerfile.
- Load Python:3.9 from the official Docker image repository.
- Install Poetry (1.1.11).
- Set working directory.
- Install necessary dependencies defined in poetry.lock and pyproject.toml.
- Copy necessary Python files into Docker Image.
- Expose port 8080.
- Set the entry point or the file to be executed when the Docker image is initialised.
Note: To achieve a working cache layer in Docker, the COPY poetry.lock pyproject.toml /deploy/ should be inserted after Poetry is installed but before any other files are added. This ensures dependencies are reinstalled only when changes are made between builds.
4. Testing the Flask application
Let’s build the docker image of our application and test it locally before deployment. Please note the folder structure of the current project linked here. The Dockerfile needs to be in the root folder for the build process.
AWS_ElasticBeanstalk_deploy
├── Dockerfile
├── README.md
├── documentation.ipynb
├── models
│   └── rf_clf.joblib
├── poetry.lock
├── pyproject.toml
├── requirements.txt
└── scripts
    ├── eb_predict.py
    ├── flask_api.py
    ├── predict.py
    └── train_iris_rf.py
In terminal, navigate to your folder and build the docker image with a descriptive tag:
docker build -t flask-api:latest .
Then run the docker image in detached mode -d and expose port 8080 with the -p option.
docker run -d -p 8080:8080 flask_api:latest
The Docker container will now be running on http://localhost:8080/predict which we can test by calling the API locally by running the predict.py script.

To see a list of running containers:
docker ps
To stop a container:
docker stop <NAME_OF_CONTAINER>
5. Deploying on AWS ElasticBeanstalk
Deploying on AWS is relatively straightforward once the application had been tested with Docker and we know it runs error free.
First we will have to create a new user on AWS and assign the right permissions before deploying from our machine to AWS. Let’s take it step by step.
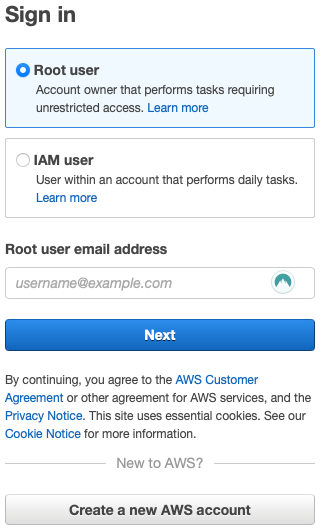
a) Log into AWS console.
b) In your console, select All Services then Security, Identity & Compliance then IAM.
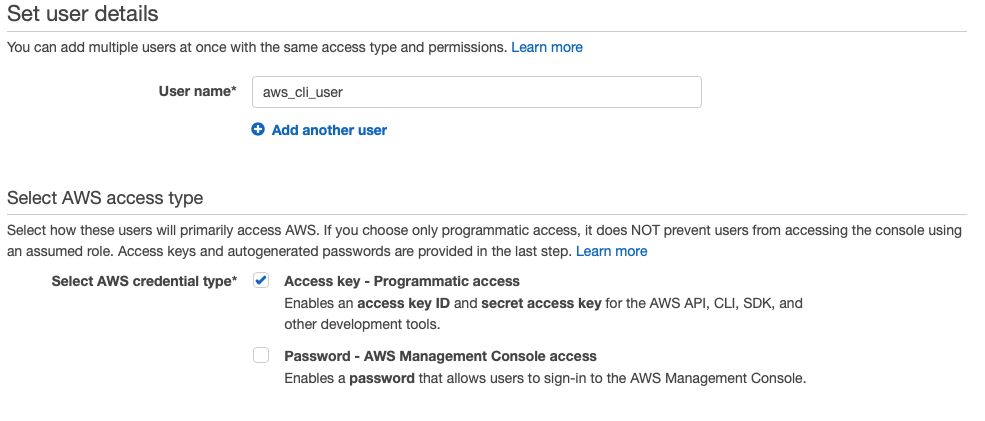
c) On the left hand tab, select Users. If you do not see the left hand tab, click on the three back bars directly below the AWS logo on the top left hand corner.
d) Select Add User and give the user a username. Ensure the Access key — Programmatic access checkbox is selected then click Next
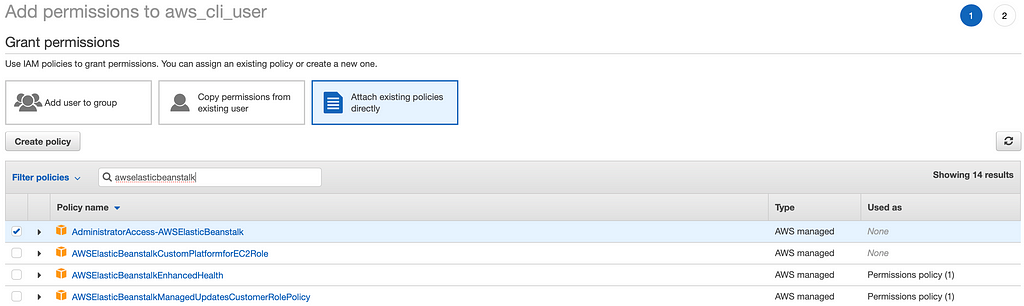
e) Let’s give this user administrator permissions for AWS Elastic Beanstalk resources. Attach the policy AdministratorAccess-AWSElasticBeanstalk to the list of permissions.
f) Skip the Add tags section and create user in the review section

g) On successful creation, copy the Access Key ID and Secret Access Key onto a notepad or download the .csv for safe keeping. We will need these keys to finish setting up AWS Elastic Beanstalk CLI.
h) In terminal, navigate to the project directory and initialise the Elastic Beanstalk CLI with:
eb init
Follow the prompts and input your access key id and secret access key if prompted. These are the settings I used for my specific project. The region will differ depending on your location and latency.
- Default region: 16
- Select an application to use: 3 [Create new Application]
- Application name: flask-api
- Docker: Y
- Select platform branch: 1 (Docker running on 64bit Amazon Linux 2)
- CodeCommit: n
- SSH: n
Note: You will notice that the AWS Elastic Beanstalk CLI will have created an .elasticbeanstalk folder containing a config.yml detailing deployment configurations.
i) After initialisation, create an application on AWS Elastic Beanstalk with the command:
eb create
Follow the prompts that appear on the screen. For this project, the default values for all the options will suffice.
Elastic Beanstalk will automatically handle all the infrastructure deployment required to help you deploy your project so you can concentrate on developing the codebase. It will go through the process of automatically creating all the necessary resources such as launching an EC2 instance, setting load balancer, auto scaling groups and routes to serve your application.
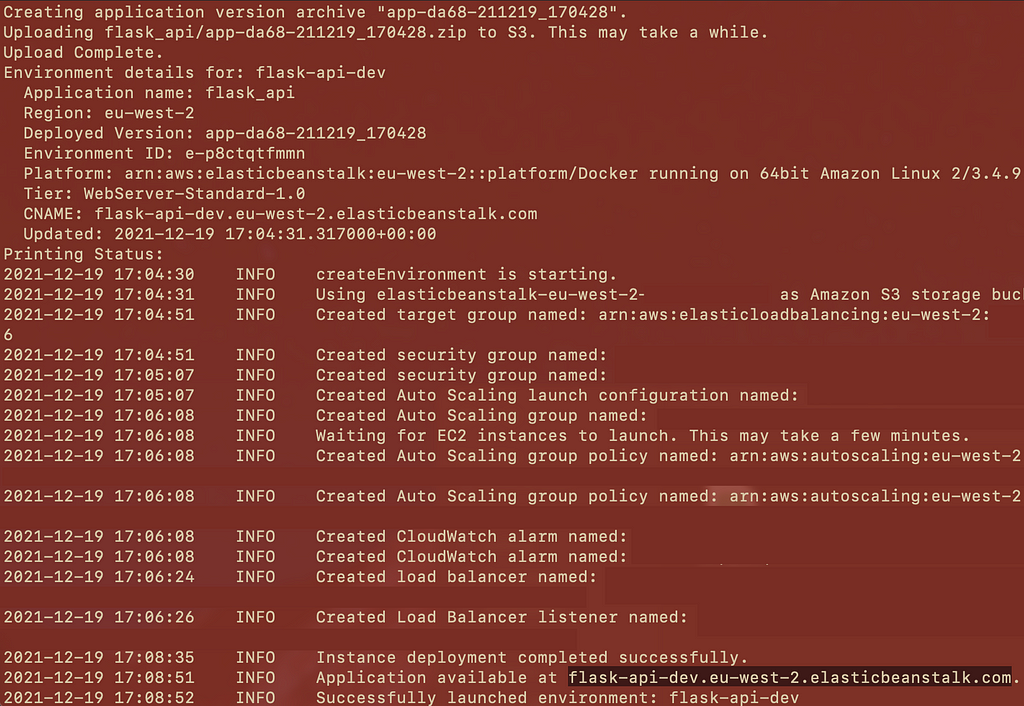
Upon successful deployment, Elastic Beanstalk will return an address where the application will be available. In this example, the application is available at https://ift.tt/3mx7wnb.
6. Serving our model as an API
Now our application is deployed in the cloud, we can access it like we did previously when testing our application locally. The only major difference this time is the address where we will be accessing the API.
Since the application was tested within a Docker container, we can expect our previous code to work with some minor adjustment. Replace the URL http://localhost:8080/predict with the URL of your application. In this case, I will be replacing it with http://flask-api-dev.eu-west-2.elasticbeanstalk.com.

If everything checks out, you should get a response with a list of predictions and an accuracy score.
Congratulations 🎉🎉🎉 you have successful deployed a Machine Learning model in the cloud that you can access with an API on any machine.
AWS resource termination
It is important to terminate your resources at the end of your project. One of the easiest ways to see all current running resources is to login to your AWS console.
Under Services select Elastic Beanstalk then Environments. Here you will find all the active environments currently deployed on AWS Elastic Benstalk.
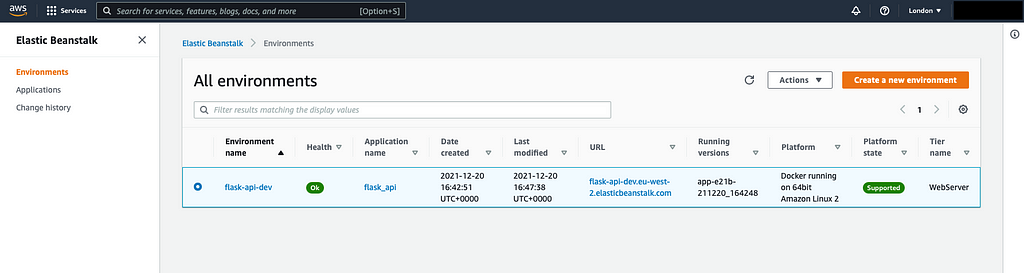
To terminate, select your environment and under the actions tab select terminate environment. You will be asked to confirm by typing the name of the environment.

The process to delete an application is similar should you wish to delete your application.
Final remarks
How you deploy your application will have many implications on the developmental build cycle and costs associated with maintaining it. It is always important to understand the requirements of your project and your end users in order to best serve your models. AWS Elastic Beanstalk is one of the many ways you can serve a model and it is important to understand that there is no one size fit all solution.
It is about using the right tool for the right job.
We have accomplished a few things in this guide. We first trained a RandomForest Classifier with the Iris data which we packaged within a Flask application as an API. Next, we containerised the Flask application in a Docker container and tested it locally before deployment. Finally, we deployed the containerised application on AWS Elastic Beanstalk which we served as an API accessible with an URL.
It is important to note that the steps taken here to deploy on Elastic Beanstalk are applicable to any Docker containerised web application.
If you have reached the end of this guide, I hope you have learned something new. Please do follow me on Medium and Twitter (@iLloydHamilton) for more data science-related content.
Watch this space.
Deploying Docker Containerised ML Models on AWS Elastic Beanstalk was originally published in Towards Data Science on Medium, where people are continuing the conversation by highlighting and responding to this story.
from Towards Data Science - Medium https://ift.tt/32ilVgh
via RiYo Analytics

ليست هناك تعليقات