https://ift.tt/3bJDdE7 A short guide to avoid conflicts between python projects If you’re just getting started with python for data scienc...
A short guide to avoid conflicts between python projects
If you’re just getting started with python for data science or development, you may have come across a common starter’s problem — why your project no longer runs after working on something else for a while. You may also not know where your python packages are stored or how to manage different versions of python between projects. Well, give a sigh of relief, virtual environments have come to the rescue (actually they’ve been around for a really long time. So long that I couldn’t find a reference…).

What are they?
Python virtual environments are, in simple terms, a contained environment for separate pythons to live on your computer 🐍. What this means is that you can have separate virtual environments with separate versions of python and python packages for each of your projects. Consequently, you can install or remove python packages on one project and it will not affect any other project you may have.
Note: this guide assumes you have python 3 installed. If not, visit https://www.python.org/ for installation instructions.
Where do you put them?
Some people like to put all of their python virtual environments in one folder, however, I find this approach makes it hard to keep track of what environment belongs to what project. A more common practice for python virtual environments is to place them at the root of each of your projects.
For example, if you had a project named “example_project”, you could change your current directory to there
cd example_project
and then create your virtual environment by following along with the below steps.
Creating a virtual environment
A common way people used to create virtual environments was with a python package known as virtualenv, but as of python version 3.3, parts of virtualenv actually got built into python under the module name venv. You can now create a virtual environment with the following command:
python3 -m venv venv
What’s going on here?
- Well, python3 is your installation of python. If the version of python you installed is called python, python3.7or python3.9 or anything else, then use that;
- -m venv is an argument that tells python to run the virtual environment module, venv;
- and, finally, the last venv is the name of your virtual environment folder. Some people like to use another name (e.g. env or .env), however, this is completely up to you.
What this command should do is create a python virtual environment called venv at your current directory.
Note: if you use git, you will want to add venv/ to a new line of a file called .gitignore to make sure you don’t version control your virtual environment. If you forget this step, you can clog up your git repository with hundreds of additional version controlled files.
Once you have created your virtual environment, you won’t need to do this again. You will now be able to use your environment, as per the below steps.
How to use them
To use a virtual environment, you need to “activate” that environment with the following command:
(on MacOS and Linux)
source venv/bin/activate
or (Windows)
venv\Scripts\activate
If you are using fish shell on MacOS or Linux (like me) you will need to substitute the above MacOS or Linux command to:
source venv/bin/activate.fish
What the above commands did was change the commands python and pip (pythons package manager) to refer to those located in the venv folder. A helpful indicator should appear that shows you are using your virtual environment like the following:
(venv) $
This means that when you install a package with pip, e.g. with
pip install numpy
You will now install it in the virtual environment contained within your venv folder. If you like, you should be able to view the files of the packages you install in venv/lib/python3.9/site-packages . You will have to substitute python3.9 for your version if this is different.
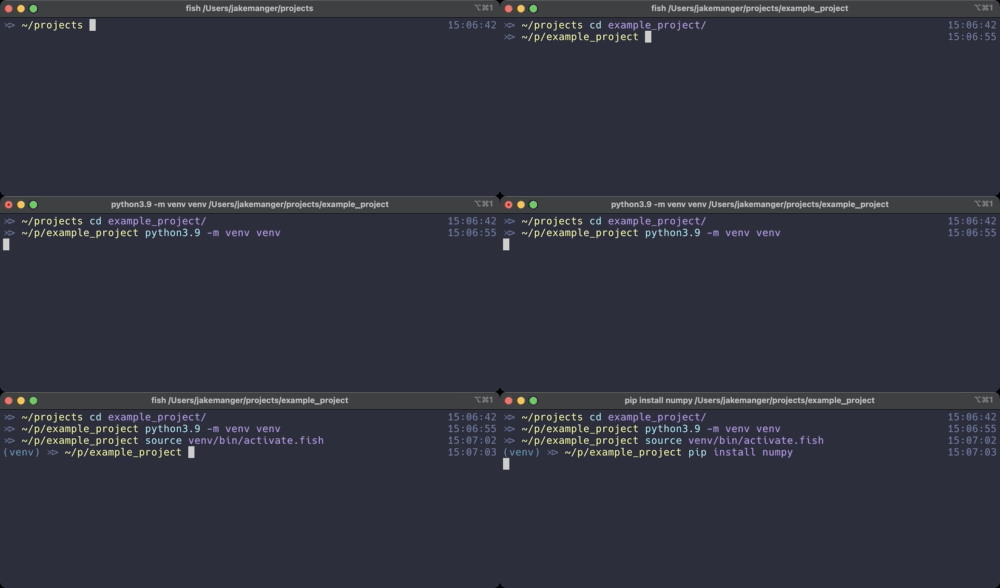
When following the above steps, you should see something similar to the GIF below.

Continuing with this example, if you now start python in interactive mode, you will be able to access these packages using the following commands:
python
import numpy as np
print(np.sqrt(5))
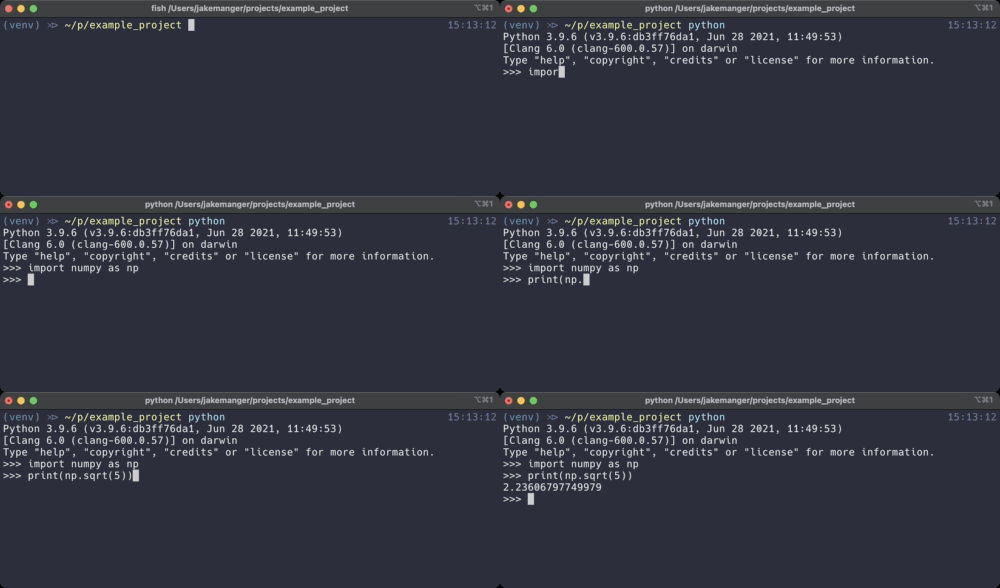
If everything went correctly, you should have seen something similar to the following:

You should also be able to access any packages you install when using python to run your python files. For example if you wanted to use the python contained within your virtual environment to run a file called “main.py”, you could do that with the following command:
python main.py
When you are done with your virtual environment, you can close the terminal or, alternatively, deactivate the environment with the command as follows:
deactivate
This will also now let you activate a different virtual environment for another one of your projects if you need to.
Reproducing your environment
So you can reproduce a python virtual environment (e.g. on another machine), you will commonly want to save the packages you install to a file. This will let anyone with your file, install the same version of packages that you used when developing your project. You will however likely still want to tell them what version of python you are using. Commonly people like to use a file called “requirements.txt” for this purpose.
If you have activated your python virtual environment, you can automatically generate a requirements.txt file with the following:
pip freeze > requirements.txt
You can also edit this file or manually create one if you prefer (e.g. you don’t want to be so strict on the version of the package). See here for further details.
So if you or someone else wanted to create a virtual environment and use the same packages as you did, they can follow along with the above commands to create and activate a virtual environment and then, install your requirements. Installation of requirements is possible using the -r method of pip as follows:
pip install -r requirements.txt
Where to now?
I’ve showed you the simplest and standard way to use virtual environments with python, however, if you’re so inclined, there is a whole world of different ways you can work with virtual environments and python. Most of the time these aren’t unnecessary, but if you’re so inclined, some notable packages that provide a different way to work with virtual environments and packages are:
- poetry https://python-poetry.org/, and
- conda https://www.anaconda.com/products/individual
Well if you’ve made it this far, thank you. I hope this article helps you progress further in your data-science (or whatever it is you do) journey. If you enjoyed this article, please clap and follow me to help keep me motivated to write more. If you have any questions, please add them below.
Getting Started with Python Virtual Environments was originally published in Towards Data Science on Medium, where people are continuing the conversation by highlighting and responding to this story.
from Towards Data Science - Medium https://ift.tt/303O2hY
via RiYo Analytics

No comments